

Open in TWICE Admin
orders
Prerequisites
Have ready before you start:
- A checklist template with the boxes and fields of your paper form, active for orders. Build it under Settings → Documents. See Documents settings.
- A document shortcut for the template in the order’s side panel, added under Settings → Orders → Order view. See Order view.
- A phone or tablet with a camera, for the damage photos.
The walkthrough
1
Open the order
Open Orders and enter the order’s reference or the customer’s name in Search all orders. With more than one location, check the location selector in the top-left corner first. Click the order’s row. The order opens on its Summary tab.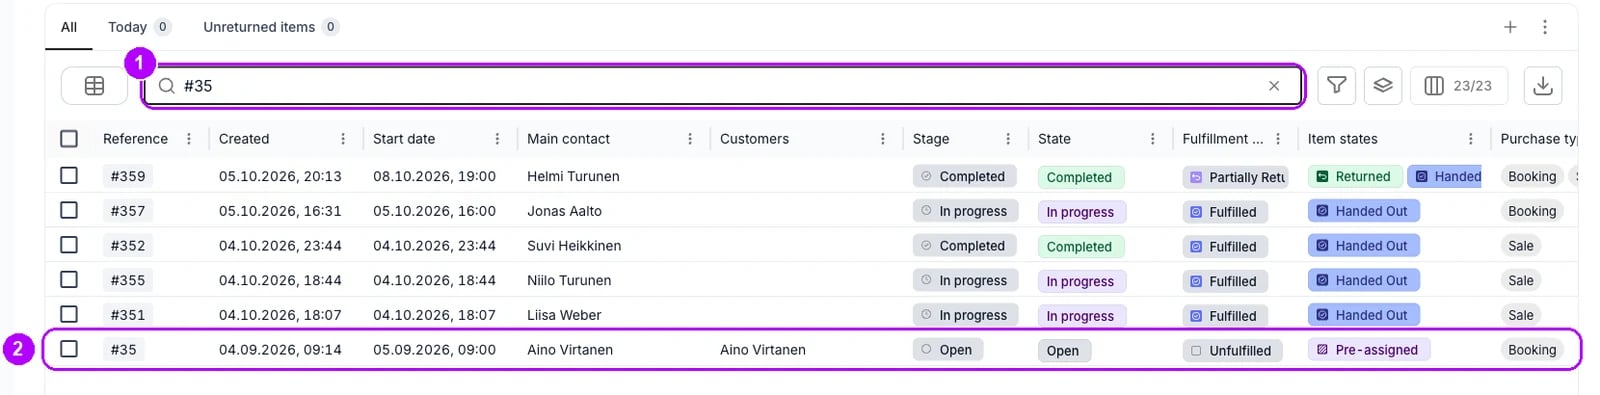
2
Click the checklist's shortcut
In the Shortcuts card at the top of the side panel, click Create followed by the checklist’s name, such as Create Handover checklist. A dialog opens on the checklist, with File name above it.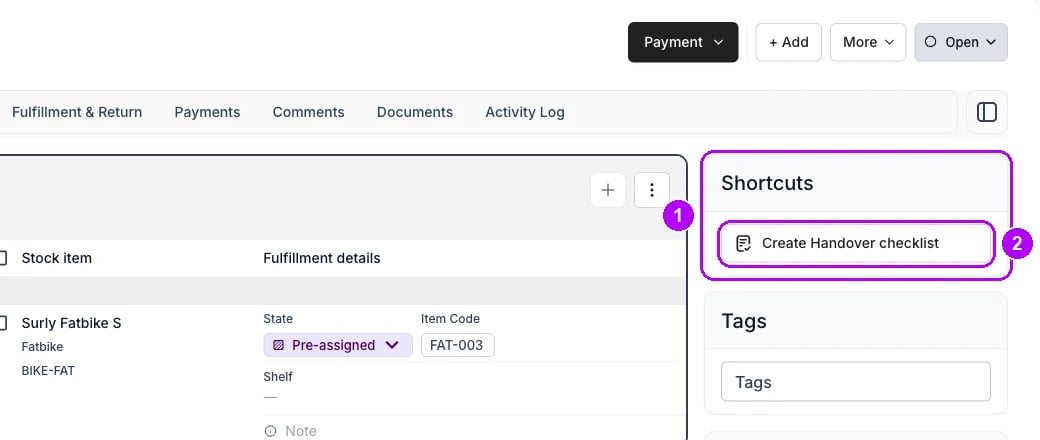
3
Fill in the checklist
Tick the boxes, choose the options and type your notes in the checklist itself. Every field is kept in the PDF as you leave it.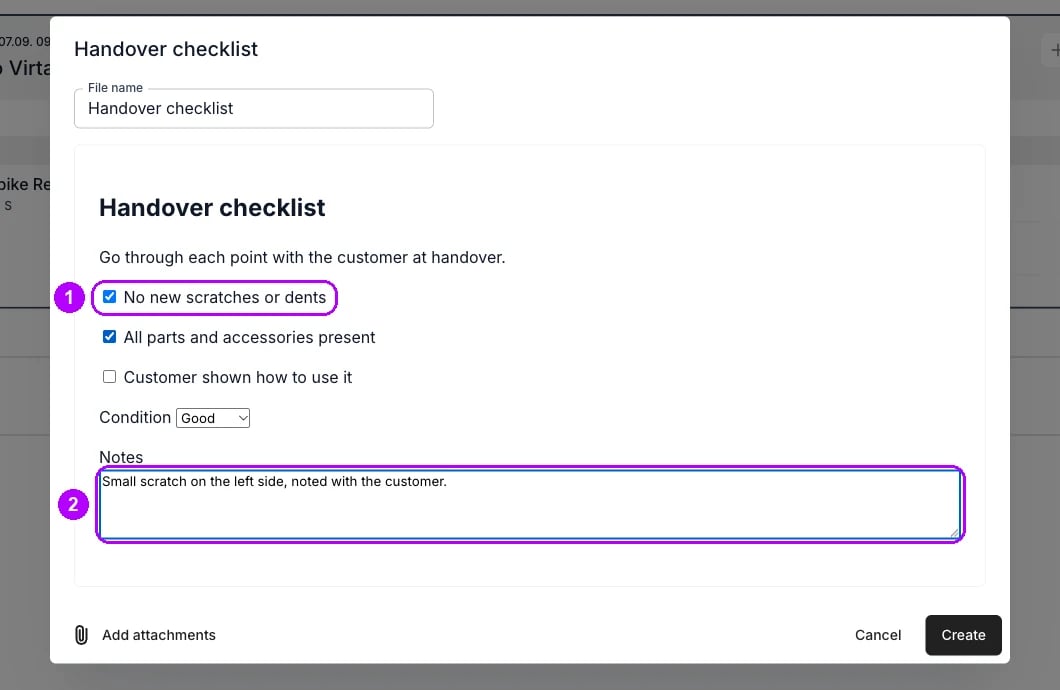
4
Click Add attachments
Click Add attachments in the bottom-left corner of the dialog. The file manager opens on the order’s folder. Its bottom-left corner reads Use another device, above a QR code.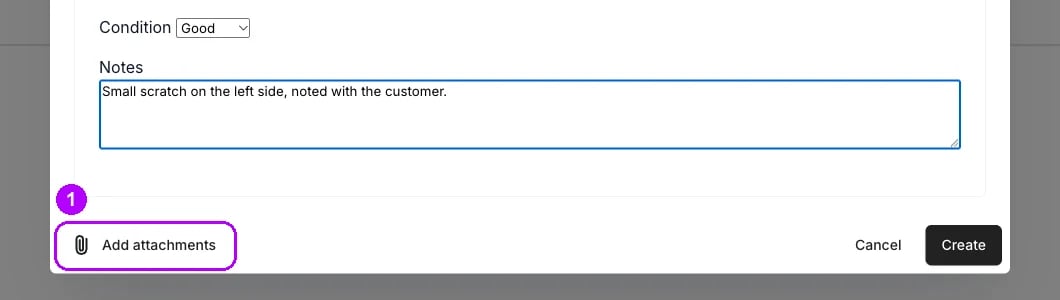
5
Scan the QR code with your phone
Scan the QR code under Use another device with the camera of your phone or tablet, and open the link it offers. The phone opens a page headed Upload media.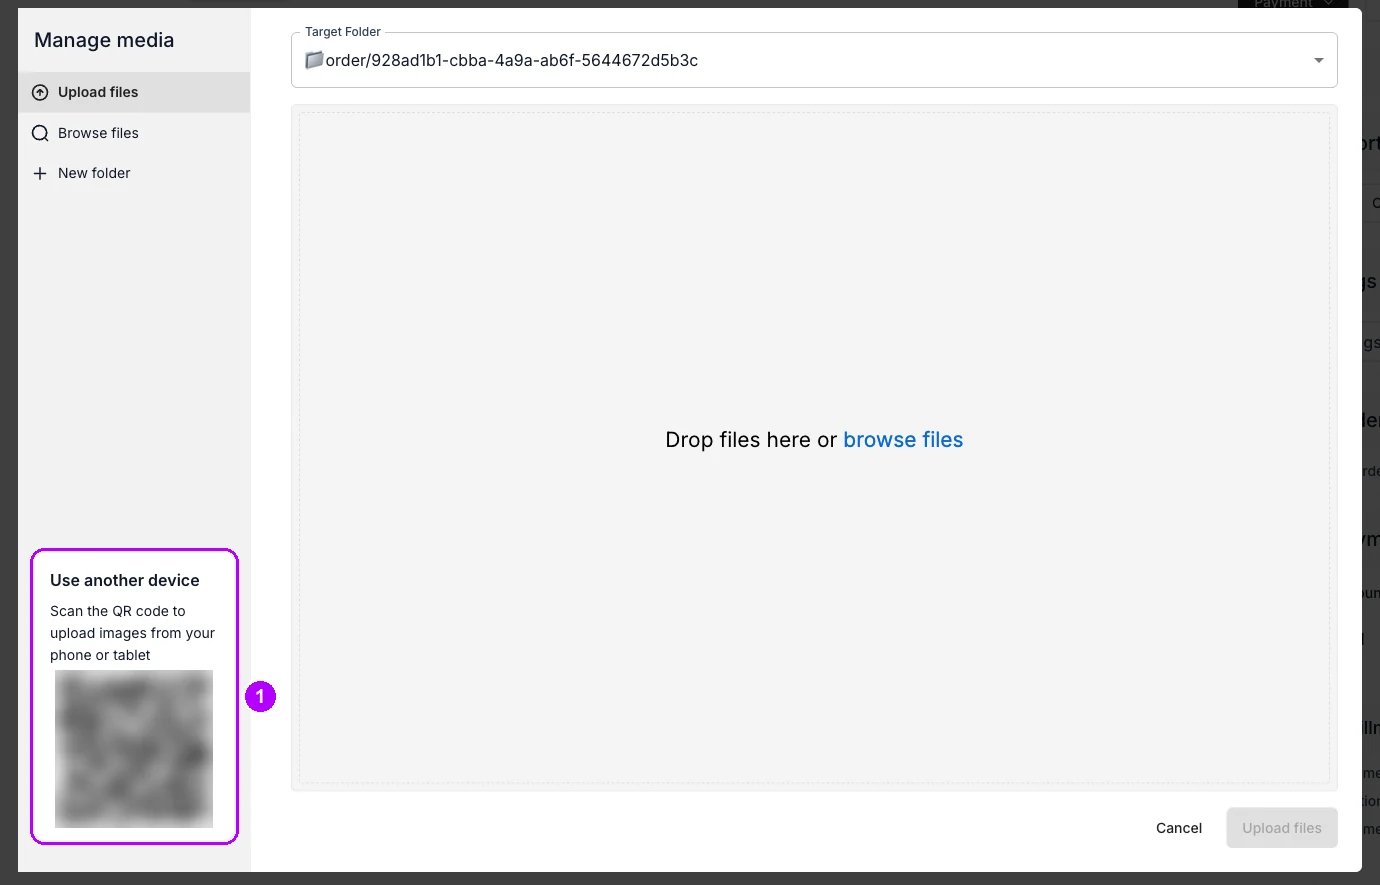
6
Photograph the damage
On the phone, tap the camera button above “Tap to take photo or upload from device” and take the photo. The phone confirms it, such as 1 photo uploaded. Tap Take another photo for the next one. On screen, the file manager moves to Browse files with the new photos ticked.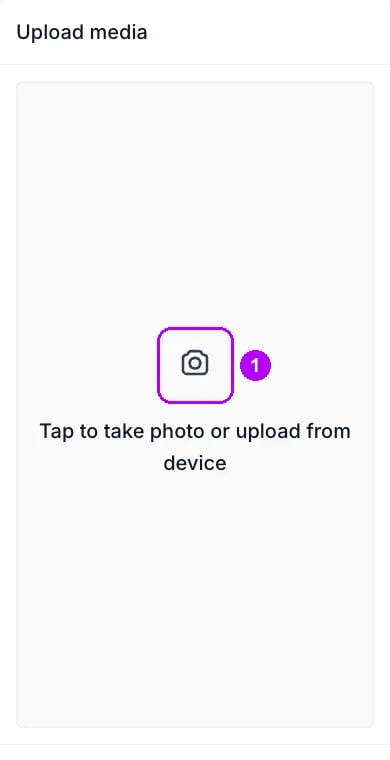
7
Save the photos to the checklist
Click Save selected in the bottom-right corner of the file manager. The label counts the ticked photos, such as Save selected (2). The file manager closes, and the dialog lists the photos under Attachments, below the checklist.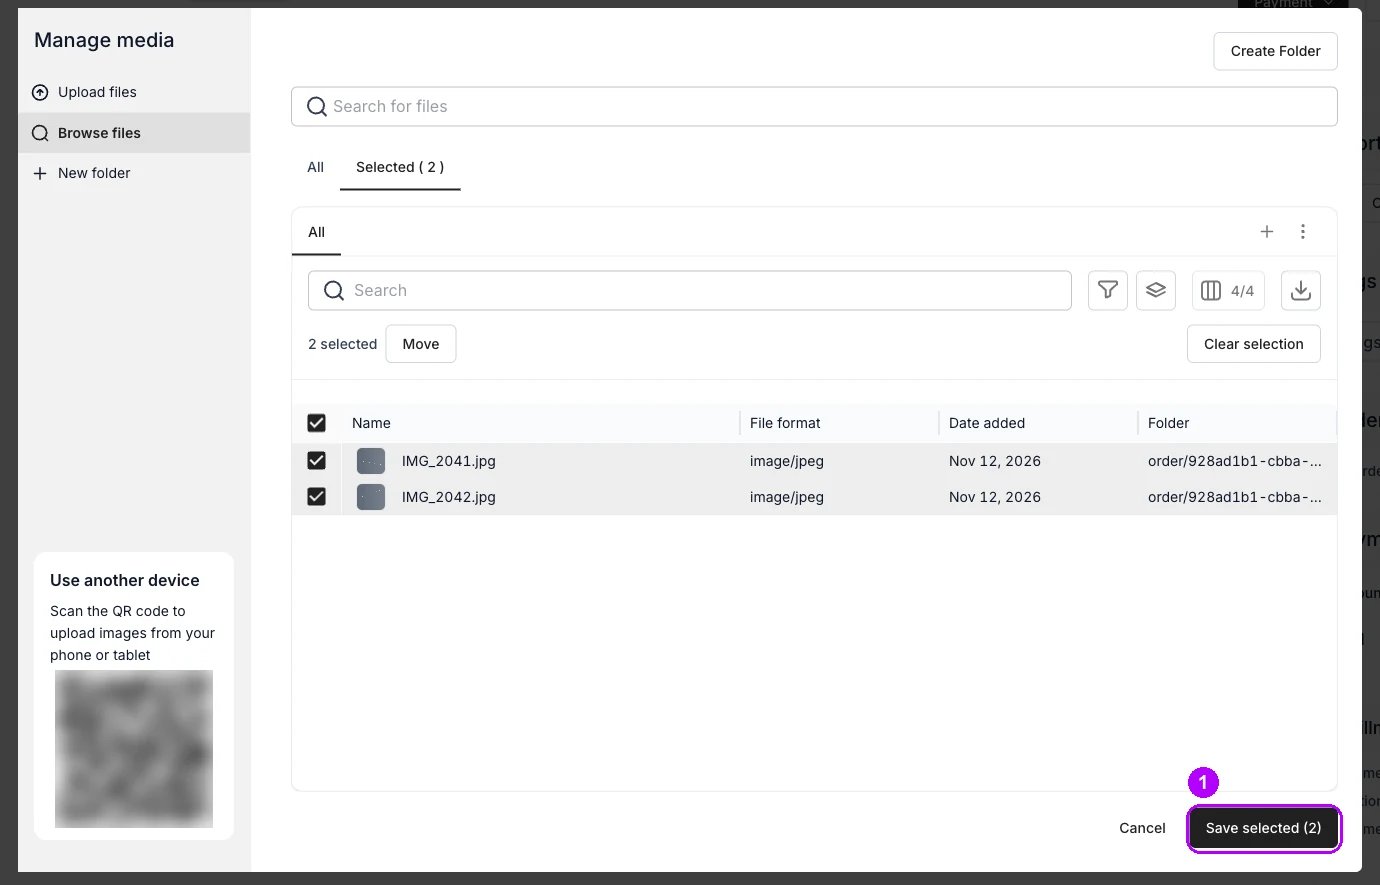
8
Create the PDF
Check File name at the top of the dialog and the photos under Attachments, then click Create in the bottom-right corner. Document created successfully confirms it, and the dialog closes. Nothing on the order asks for a checklist, so an order starts and closes without one if nobody creates it.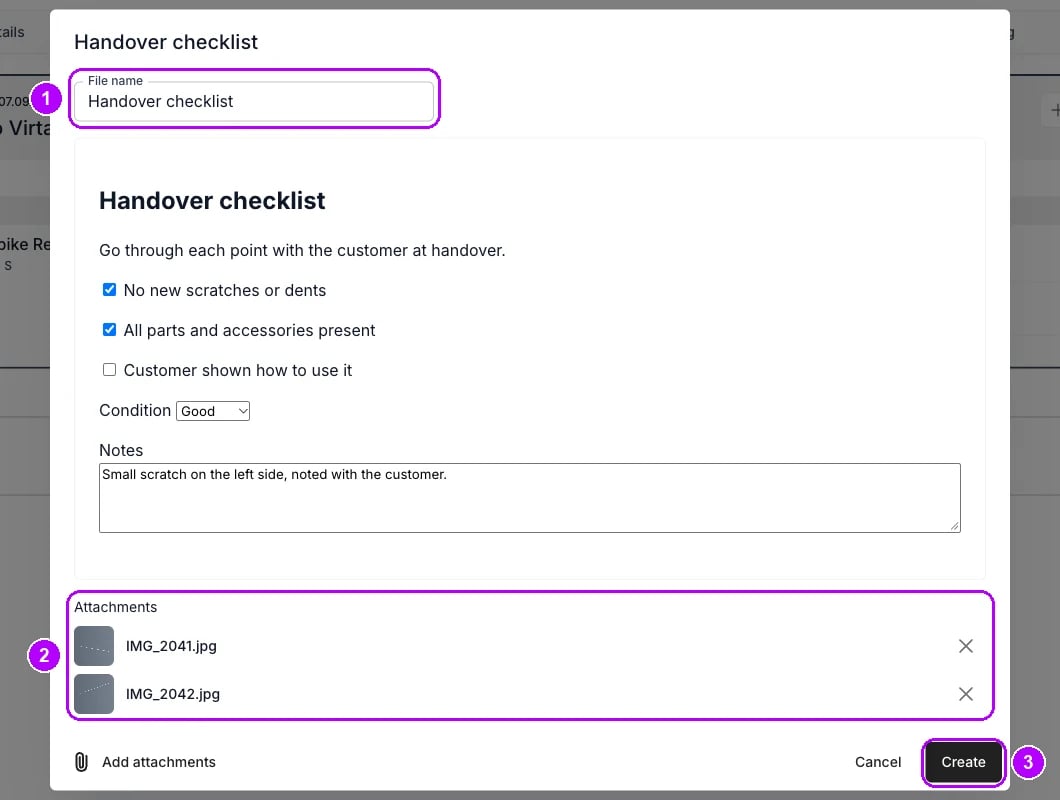
9
Open it from the Documents tab
Click the order’s Documents tab. The checklist is listed under its file name. Click its row to open the PDF in a new browser tab: the checklist ends in an Attachments list naming every file, and each photo follows on a page of its own.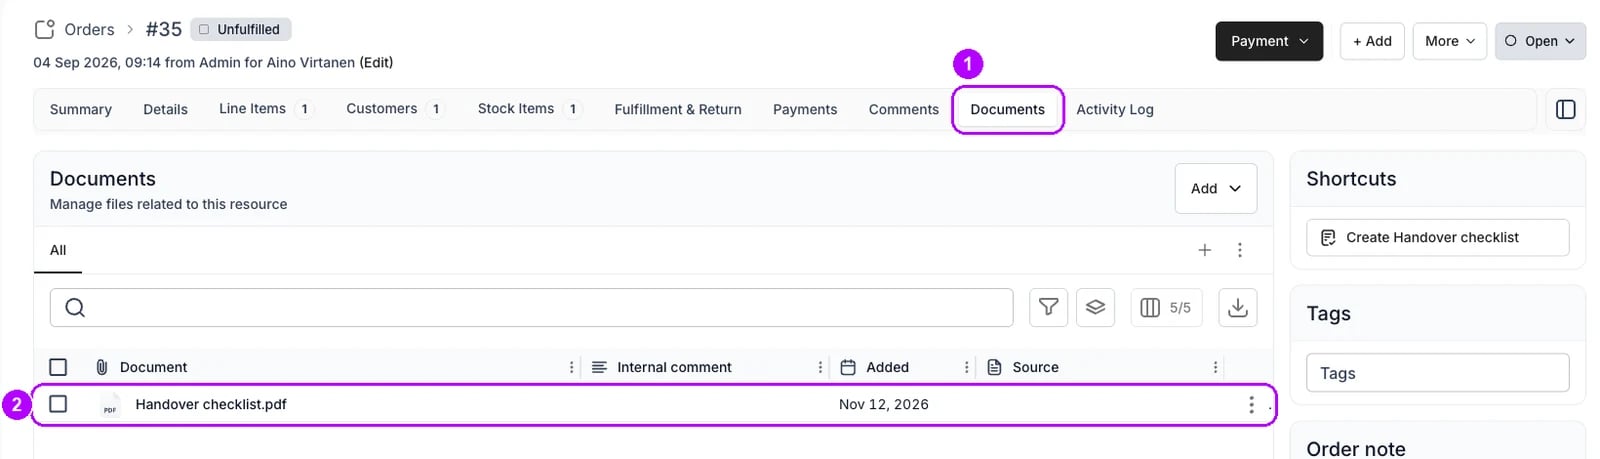
How do I know it worked?
- The checklist is listed on the order’s Documents tab under the file name you gave it.
- The PDF shows what you ticked, chose and typed, as you left it.
- Each photo is a page of its own after the checklist, and the Attachments list at the end of the checklist names every file.
Troubleshooting / common pitfalls
There is no Shortcuts card on the order
There is no Shortcuts card on the order
If the side panel is closed, click the button at the right end of the tab row. Otherwise no shortcut can show: none is set, its template is no longer active for orders, or your role cannot create order documents. Open the Documents tab, click Add, choose Create from template and pick the checklist instead. See Order view.
Damage marked on the last checklist is missing from this one
Damage marked on the last checklist is missing from this one
A checklist keeps what you entered in its own PDF, and a new one starts from the template again. Nothing reaches the stock item either, so record new damage on the stock item, where the next colleague sees it. See Record a damaged item.
The customer has to sign the checklist
The customer has to sign the checklist
The checklist takes no signature on screen. Open the PDF from the Documents tab and print it for the customer to sign. Add a photo of the signed copy with Add → Upload on the same tab, which offers the same QR code. See Order Documents.
Related articles
Order Documents
Created documents, their attachments and the files on an order.
Documents settings
Build the templates a checklist is created from.
Order view
Add the document shortcut to the order’s side panel.
Record a damaged item
Note the damage on the stock item and keep it out of service.
Returns and damage
Every walkthrough for taking items back.