

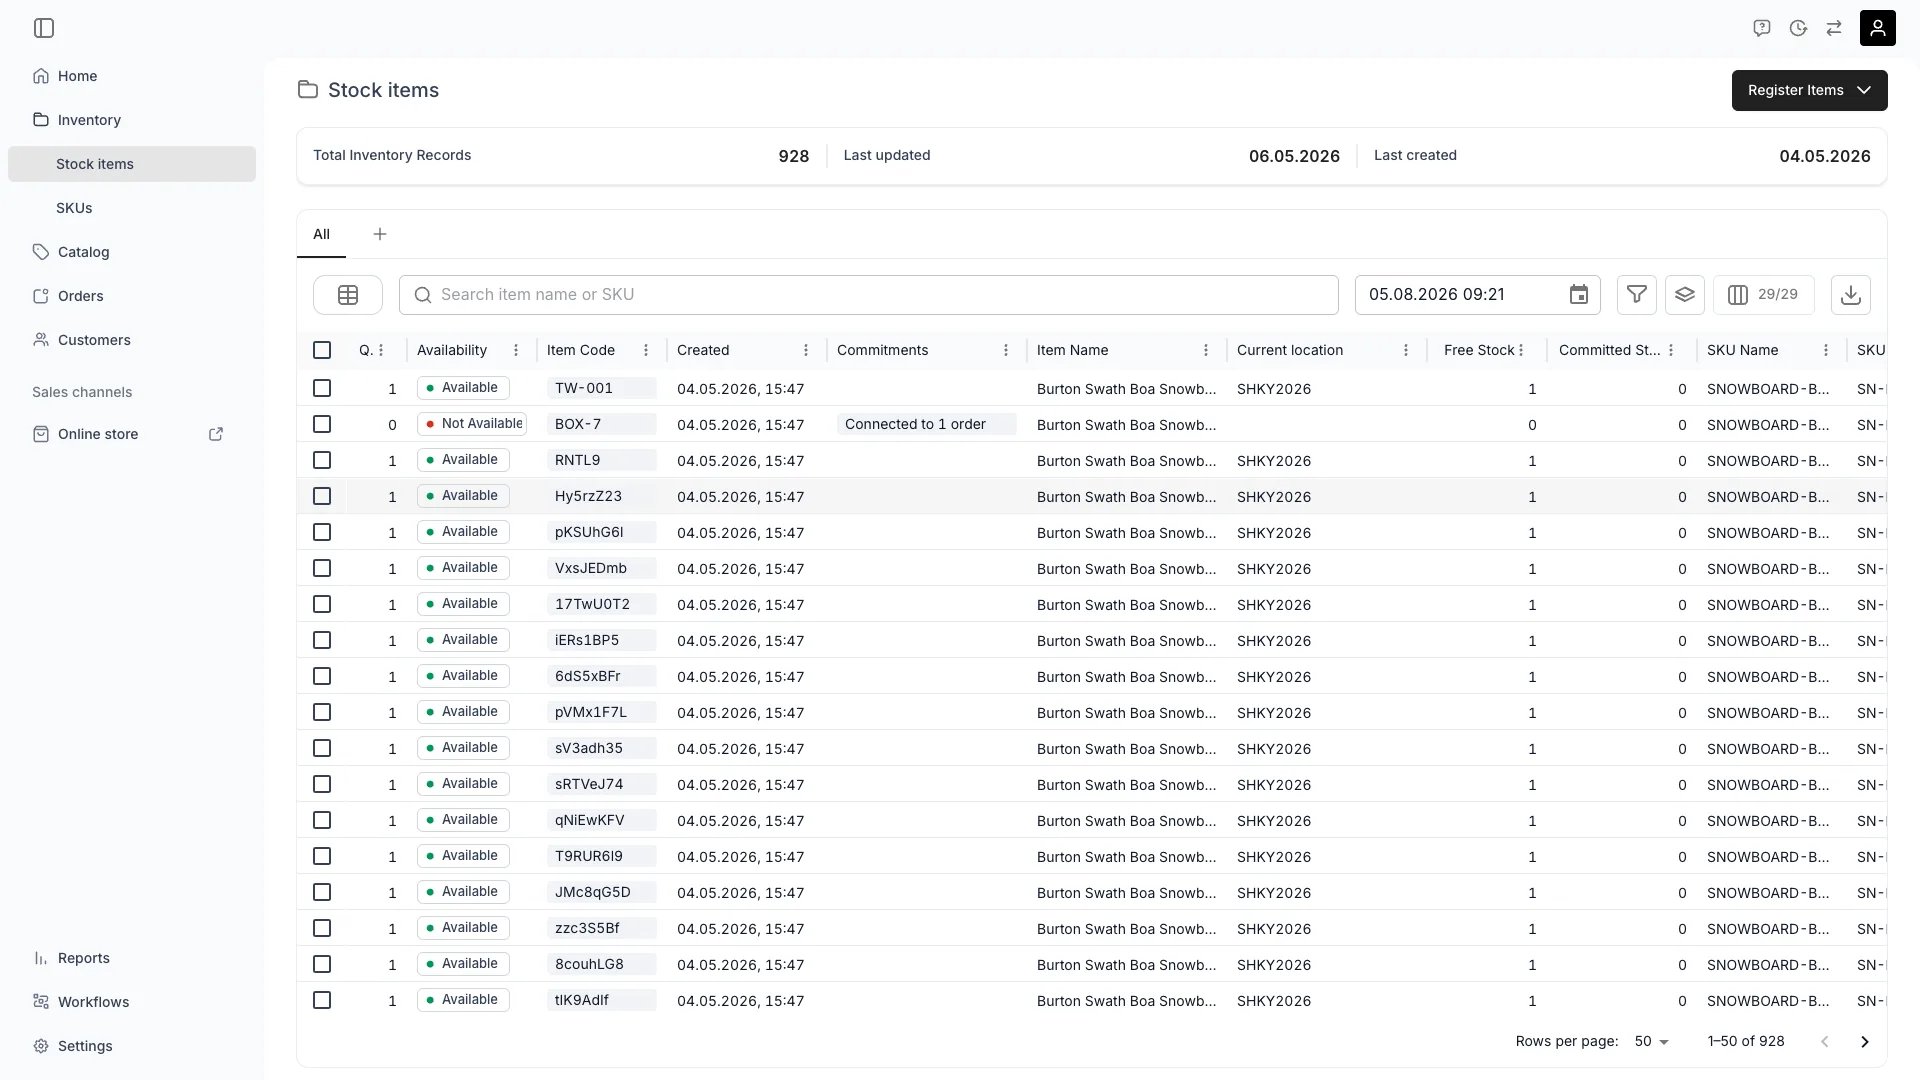
Inventory > Stock Items
Open in TWICE Admin
inventory/stock-items
Prerequisites
Before you start, decide:
- Which items belong in one selection. The edit session is built from the rows you tick, and cannot be added to afterwards.
- Whether the fields you want to change actually propagate. Item Name, Category, SKU, and attributes do. Item Code, Purchase Price, Condition, Description, and Tags do not.
- How you want differing values resolved. Where the selected items disagree, TWICE hands you a per-value dialog rather than overwriting silently.
What reaches every item
A bulk edit writes through two separate mechanisms, and they cover different fields.
“The first item” is the row whose name the page loads — the one the header would show if you were editing it alone.
The Multiple matching values dialog is the exception, and it is the more capable of the two paths: whatever it writes reaches every item in the group it lists. That includes Status, which the inline dropdown does not propagate.
So a Status change lands everywhere when the selected items started out with different statuses, and on one item when they all started the same.
Editing through the SKU instead
There is a second way to change many items at once, and for several fields it is the only one that works: edit the SKU. Stock items inherit from the SKU they are linked to. A field left empty on the item takes the SKU’s value, live — nothing is copied at link time, so changing the SKU changes every linked item that has not set its own value. One SKU edit can reach hundreds of items.
Inherited values are marked in the admin with a link icon reading Inherited from SKU.
Compare this against the table above and the split stops looking arbitrary. Purchase Price, Description and Tags do not propagate in a stock item bulk edit, but they are all inherited from the SKU, which is where they are meant to be set.Setting one of them in a bulk edit session does not just fail to reach the other items. It writes an override on the first item that will then ignore the SKU.
The walkthrough
1
Select the items
Open Inventory → Stock items and tick the rows you want. A toolbar appears above the table reading selected.
2
Open the edit session
Select Edit (). TWICE opens a stock item page titled Editing multiple items, with ( selected) beside it.Selecting exactly one row opens that item normally instead — there is no bulk mode for a selection of one.
3
Edit the fields that agree
Any field where all selected items already hold the same value renders as a normal input. Change it, and a save banner appears at the top of the page.
4
Resolve the fields that disagree
Where the selected items hold different values, the input is replaced by an amber box reading Multiple matching values. Select it to open the Edit dialog.The dialog has two halves:
- Unique values on the left — one row per distinct value, labelled with an item’s name and how many items share that value, each with its own input and a Reset button.
- Update all with one value on the right — type one value, then select Apply to all to stage it into every row on the left.
5
Write the resolved values
Nothing is written until you select Update field. That button writes immediately and closes the dialog — it does not wait for the save banner.
Item Code always opens this dialog in a bulk edit session, even when the codes happen to match, and its Apply to all is disabled: codes must stay unique, so each one has to be set by hand.
6
Set attributes across the selection
Open the Attributes tab. Attribute values behave the same way — a shared value is a plain input, a differing one is the Multiple matching values box.Add Attribute creates the attribute on your account and attaches it to every selected item straight away, with no save step. An attribute added this way is permanent: it appears on Settings → Attributes & Tags and as a column option in the Stock Items table.
7
Save
Select Save to selected items in the banner. Discard rolls the form back to what the items currently hold.
How do I know it worked?
Go back to Inventory → Stock items and add a column for the field you changed — the table pulls fresh values, so a bulk edit that landed shows the same value across the rows you selected. Attribute changes are easiest to confirm this way: attributes appear as columns in the table, and you can filter on the value you set to see exactly which items received it.Troubleshooting / common pitfalls
Only one item picked up my change
Only one item picked up my change
Cause: the field is one of the per-item fields — Item Code, Purchase Price, Condition, Description, Tags, or Status where the items already agreed. The save applied it to the first item in the selection and left the rest untouched.What to do: check the table for the field you changed, then pick the right lever. Purchase Price, Description and Tags belong on the SKU, where one edit reaches every linked item. See Editing through the SKU instead.For a value that is genuinely per-unit, set it on each item’s own page, or use an attribute. Attributes propagate across a selection, and a custom attribute is often the better home for a value you routinely set in batches.Note that the failed bulk edit left an override on the first item — it now carries its own value and will ignore the SKU. Clear that field on the item if you intend the SKU to govern it.
"An error occurred while loading the article"
"An error occurred while loading the article"
Cause: the edit session expired. A session lives in the browser tab you started it in and lasts one hour. Reopening the URL in a new tab, or coming back to it the next morning, finds nothing.What to do: go back to Inventory → Stock items, reselect the rows and start again. The session is not recoverable, and no partial write survives it — everything you saved before it expired is already on the items.
I only meant to change one value and the dialog changed several
I only meant to change one value and the dialog changed several
When this happens: Apply to all stages your value into every row in the Unique values list, not just the row you were looking at.What to do: if you have not selected Update field yet, Reset each row you did not mean to change. Once Update field has run the values are written — reopen the dialog and set them back.
An attribute I added is now on every item and in my settings
An attribute I added is now on every item and in my settings
When this happens: Add Attribute creates the attribute definition on the account, not just on the selection, and attaches it immediately without a save step.What to do: remove the value from the items, and delete the attribute in Settings → Attributes & Tags if you do not want it. See Attributes for how formats and groups work before creating more.
The value came back after I cleared it
The value came back after I cleared it
Cause: Purchase Price, Description and Media can be inherited from the item’s SKU. Clearing the override on the item drops it back to the SKU’s value rather than to empty. Inherited fields carry a link icon labelled Inherited from SKU.What to do: change it on the SKU if you want it changed everywhere, or set an explicit item-level value to override the inheritance. Editing through the SKU instead covers which fields work which way.Read more: Stock item attributes
Purchase Price and Condition never warn me that the items differ
Purchase Price and Condition never warn me that the items differ
When this happens: TWICE only checks Item Name, Status, Category, SKU, Location, Item Code, and attributes for differing values. Purchase Price and Condition are not checked, so a selection whose items hold different prices shows a plain input carrying the first item’s price, with no Multiple matching values warning.What to do: treat both as per-item fields — they save to the first item only in any case. Set them on each item’s own page, or from the SKU if the items inherit it.
Related articles
Register stock items
The dialog route, one item or a handful at a time.
Import inventory from a CSV
Bring an existing inventory in from a spreadsheet.
SKUs
The other lever — one edit that reaches every linked item.
Attributes
Formats, groups, and how attribute values are inherited.
Data tables
Filtering and column selection, for checking what a bulk edit landed on.