

Open in TWICE Admin
orders
Prerequisites
Have ready before you start:
- Your storefront’s address, the one customers open. See Domains.
- The customer’s dates, for anything booked or rented.
The walkthrough
1
Pick the dates
On the home page, click Pick-up in the search bar. Pick the first day in the calendar, then the last day. The calendar closes and the dates show in Pick-up and Return. Leave them empty to search without dates.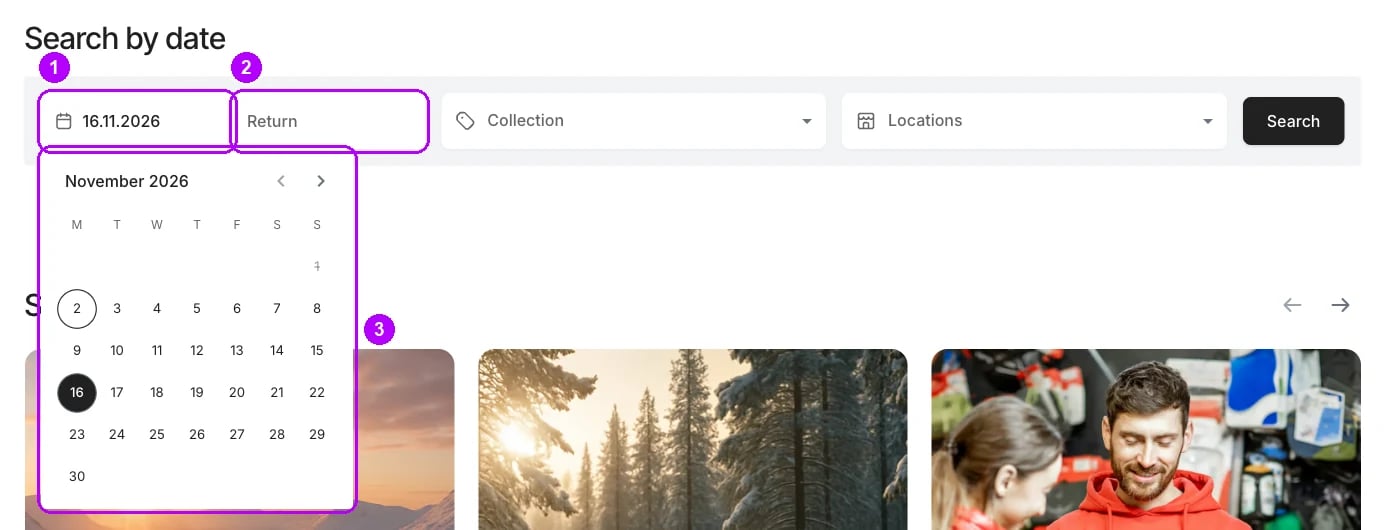
2
Narrow the search
Open Collection to search one collection rather than All Collections, and Locations to tick the stores the customer can pick up from. Both are optional, and without a location the search covers every store. Click Search at the end of the bar. The results page opens.
3
Open a listing
The results list what the store offers on those dates, in the collection and stores chosen. A listing that is fully booked on the dates can still appear, and its own page shows what is free. Click a listing’s card to open it.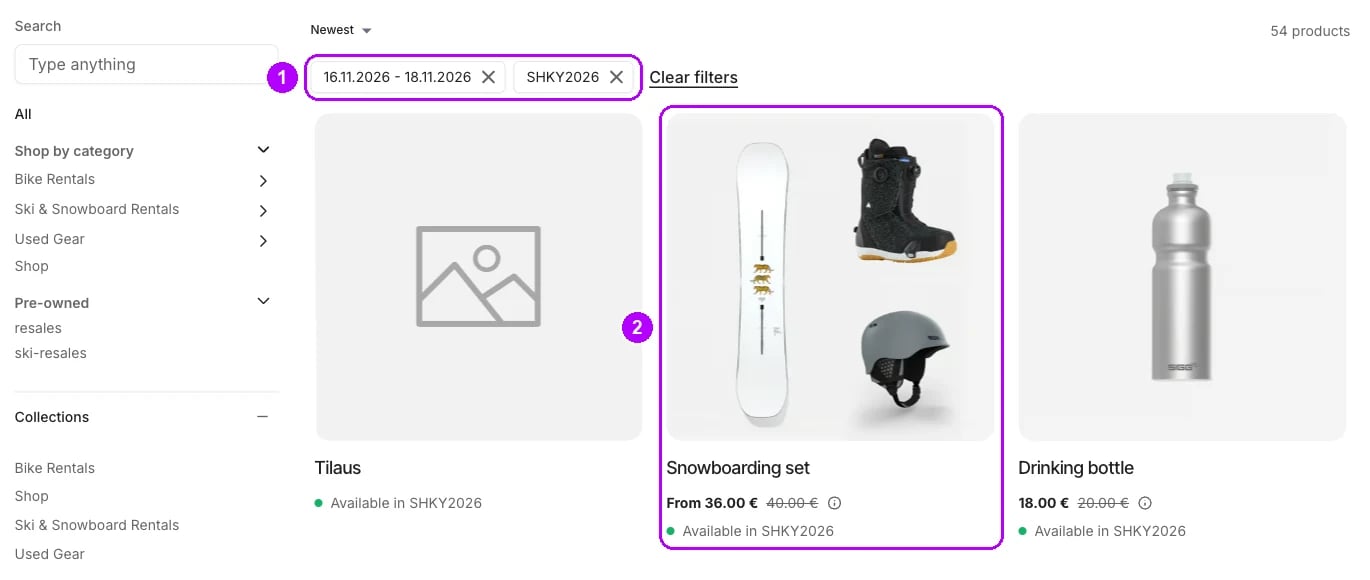
4
Pick the times
On the listing page, Booking dates shows Pick-up and Return with the dates from the search. Pick a time for each. If the listing shows Booking options, choose one first. If the listing is also sold outright, click Book from first to open the booking panel.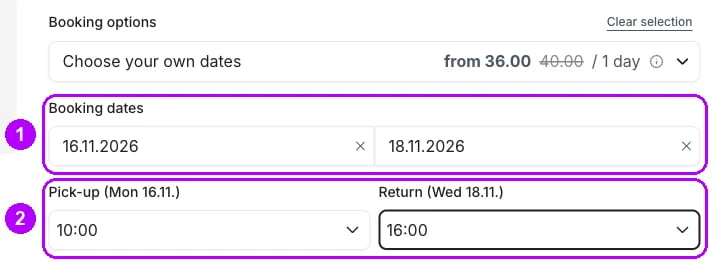
5
Choose add-ons
Select the add-ons the customer wants under Also book, or under Also buy for add-ons that are sold, and set each quantity. A required add-on is included already. Skip this step when the listing has no add-ons.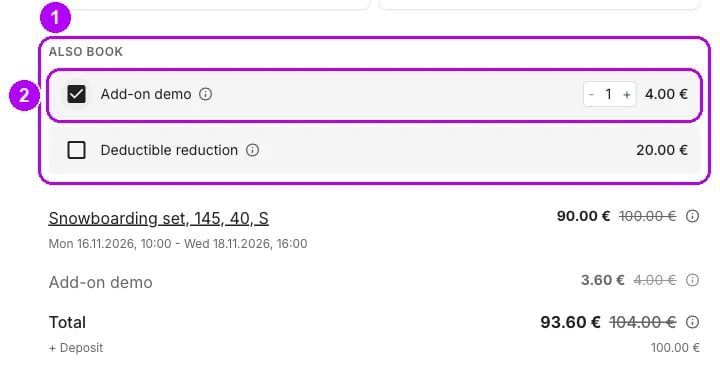
6
Add it to the cart
Click Book for and the total at the bottom of the booking panel, or Buy for and the price for an item sold outright. The Added to cart panel opens on the right. Click Go to cart in it.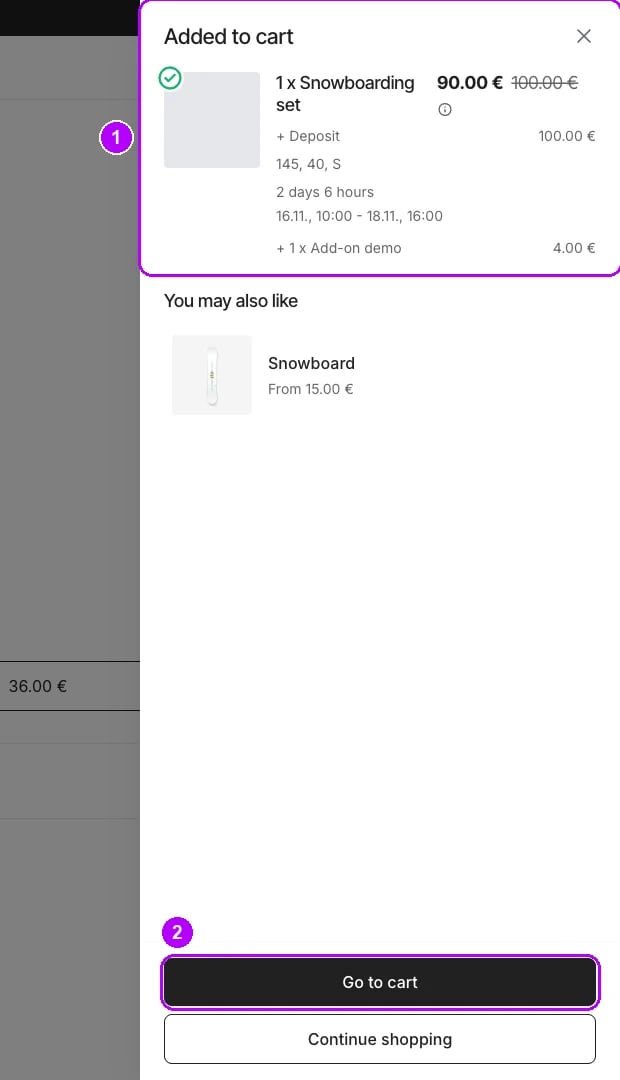
7
Choose the pickup store
Above the items in the cart, click the card reading Select a pickup store. The Select store panel marks each store Cart available or Cart unavailable. Click Select on an available one. The card then reads Pick-up from and the store’s name. A single-location store picks it for you.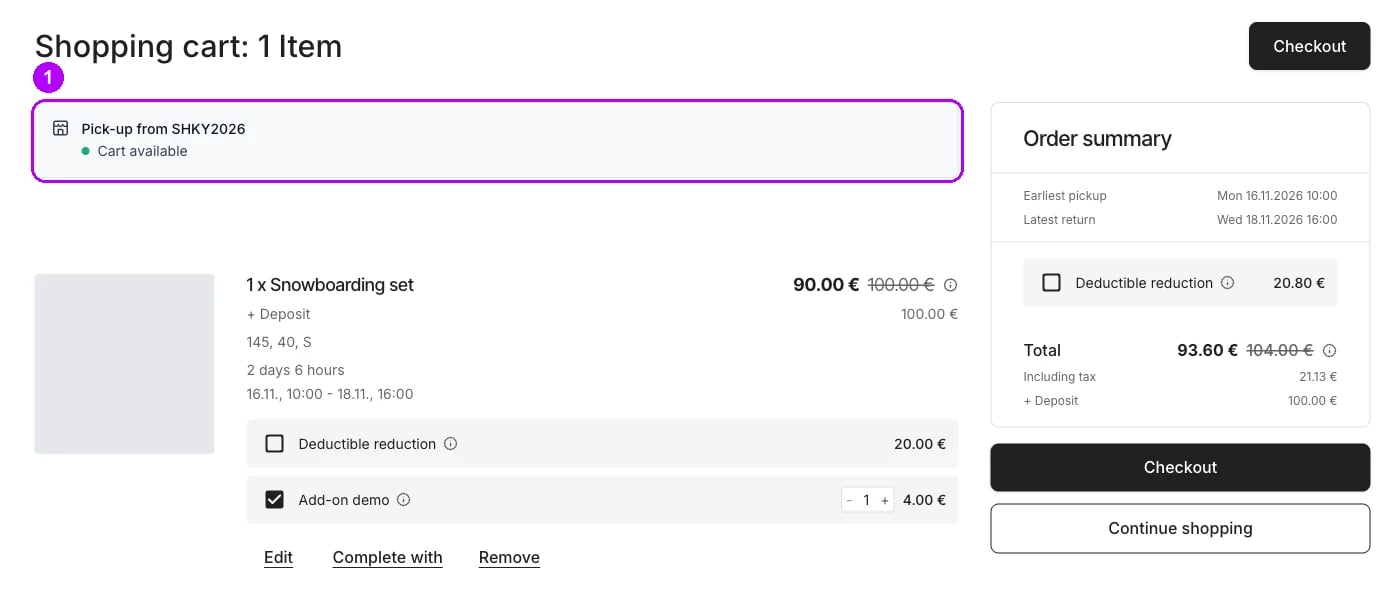
8
Go to checkout
Click Checkout at the top right of the cart, or in the bar at the bottom of the screen on a phone. Checkout opens on its first step, with the steps named across the top. If no store is chosen yet, the Select store panel opens first.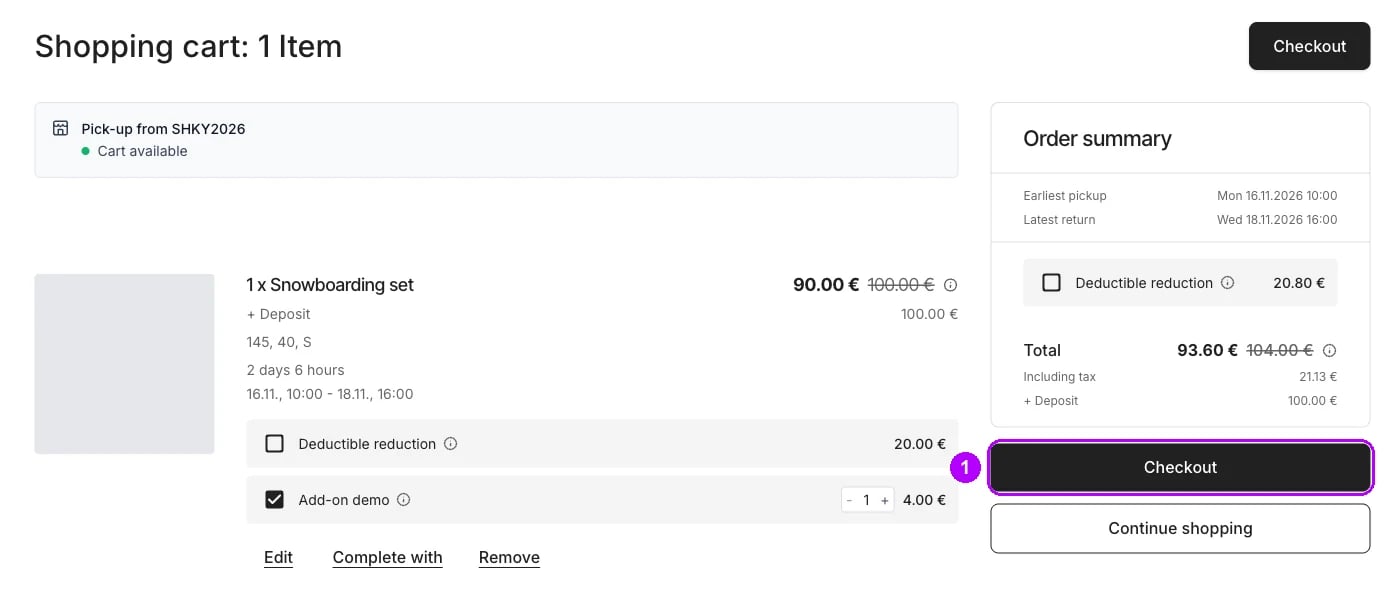
9
Check the delivery details
On Delivery, check that Collect from store is followed by the right store’s name and address, and that Pick up & return shows the right dates and times. Click Continue at the bottom of the step.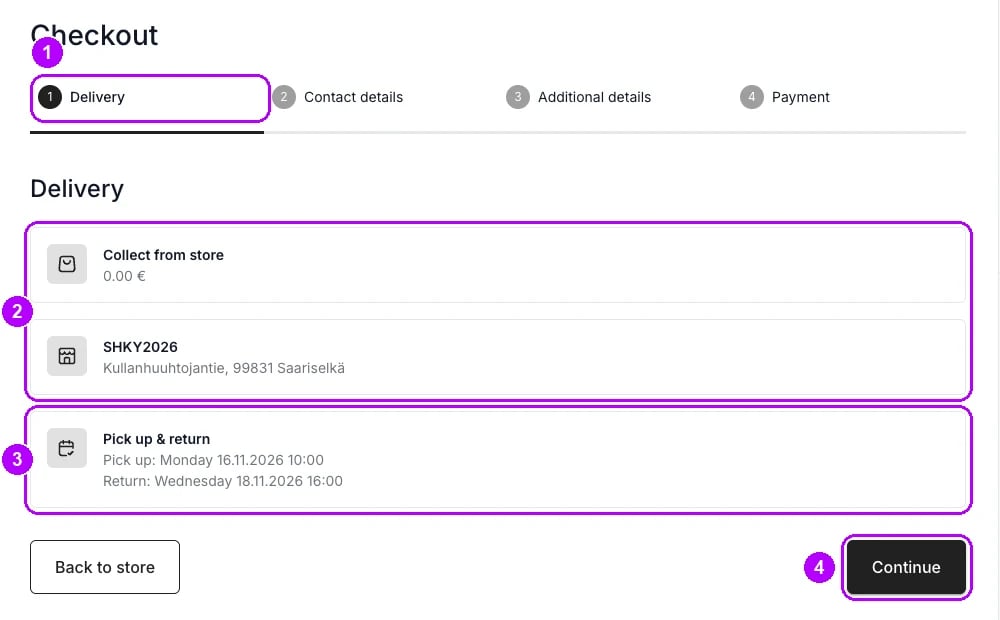
10
Enter the contact details
On Contact details, enter the customer’s details: by default first name, last name, email address and phone number. Tick the consents the store asks for, because a required one blocks the step until it is ticked. Click Continue. A listing that needs more information adds an Additional details step next.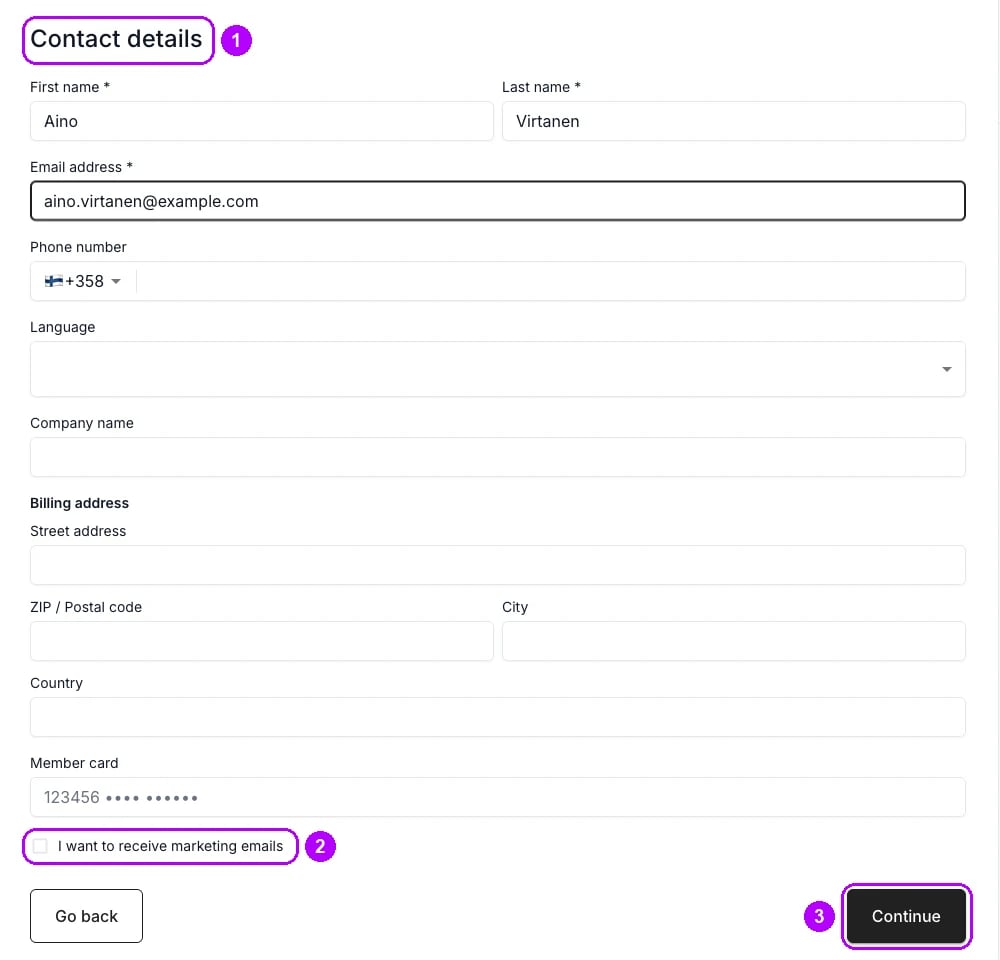
11
Pay
On Payment, choose one of the payment methods the store offers and fill in what it asks for. An online method ends in a button reading Pay and the amount. A method that charges nothing online ends in Confirm. Clicking either places the order.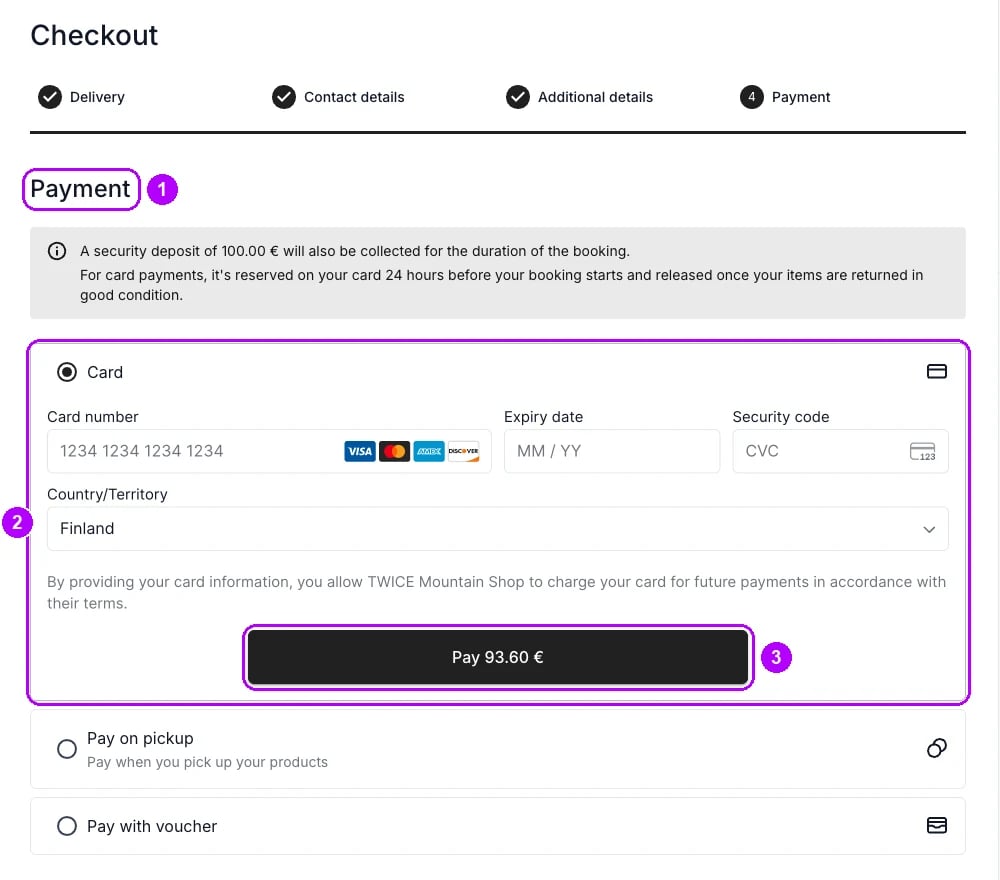
12
Read the confirmation
The Order confirmation page opens once the payment goes through. Give the customer the number under Order reference, which is what you search for in admin. TWICE also emails the customer a confirmation while the storefront confirmation email is active under Settings → Emails.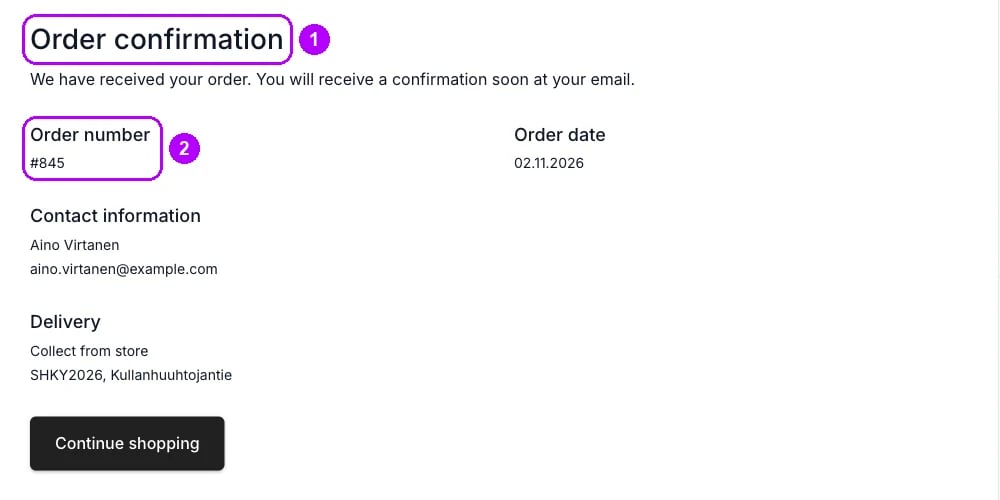
How do I know it worked?
- The confirmation page shows an order reference.
- The order is in Orders. Type the reference in Search all orders in TWICE Admin. The order sits at the pickup store’s location, with the dates, items and add-ons the customer chose.
- The customer has a confirmation email, while the storefront confirmation email is active under Settings → Emails.
Troubleshooting / common pitfalls
A listing in the results cannot be booked for the dates
A listing in the results cannot be booked for the dates
The search lists what the store offers on those dates, and a fully booked listing still appears. Pick other dates on its page or open another listing. See Listing availability.
The order is not in Orders
The order is not in Orders
The table lists only the orders of the locations selected in the top-left corner of the admin, and the order sits at its pickup store. Add that store to the selection. See Work the day’s pickups and returns.
Related articles
Online store
The storefront’s pages, store selection and booking panel.
Checkout steps and sections
What each checkout step shows, and how to change it.
Listing availability
Why a listing can or cannot be booked for the dates.
Set up the online store
Launch the storefront and connect your domain.