

Open in TWICE Admin
orders
Prerequisites
Have ready before you start:
- The order’s location, selected in the location selector in the top-left corner when your account has more than one. The order is created there, and availability is counted at that location.
- The customer’s name, to find them, or their details to add them as a new customer.
- The listing and the dates, to check what is free over the period.
The walkthrough
1
Create the order
Open Orders and click Create Order in the top-right corner, or press 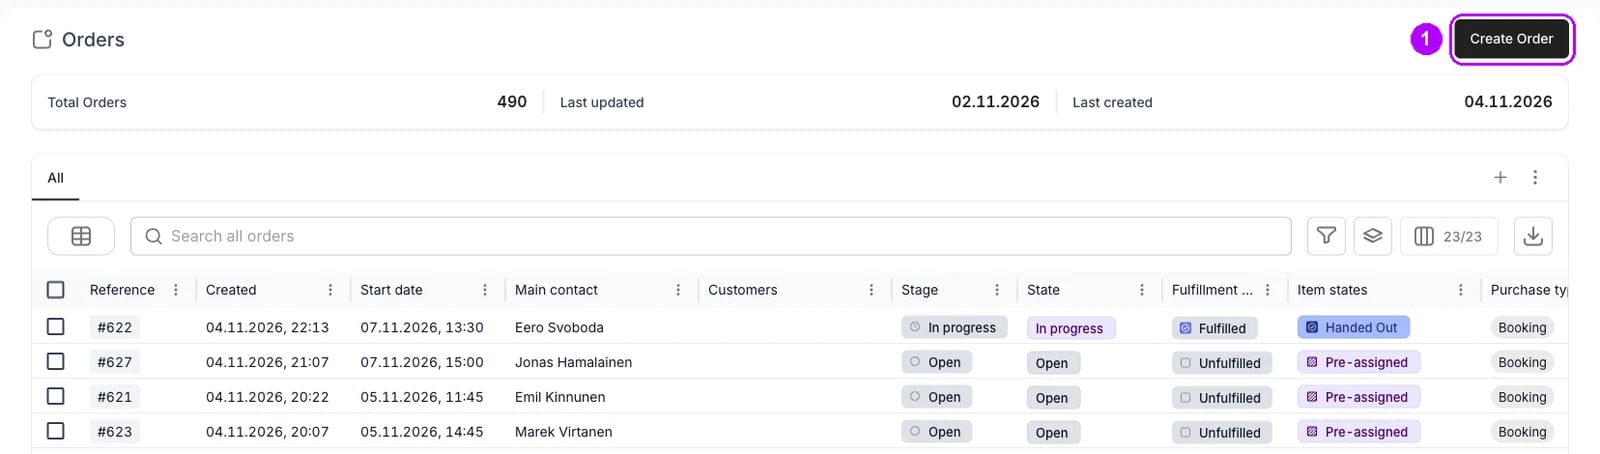
a. With one location selected, the order is created there at once and opens.With several locations selected, the button reads “Create Order…” and asks for the location first.2
Pick the location
Pick the location in the Select location dialog. Type in Search for a location to narrow the list, then click the location the order is for. The order is created there and opens.Skip this step when only one location is selected: no dialog opens.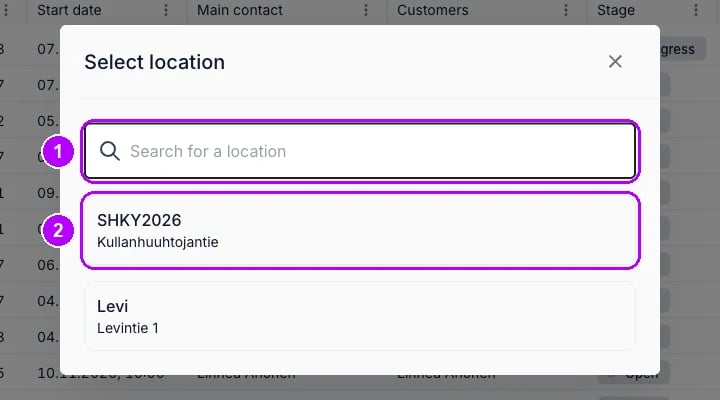
3
Open the Add panel
Check the new order. It opens on its Summary tab, still empty, and the status chip in the top-right corner reads Open. The order is saved already.Click + Add in the top-right corner. The Add panel opens on its Listing tab.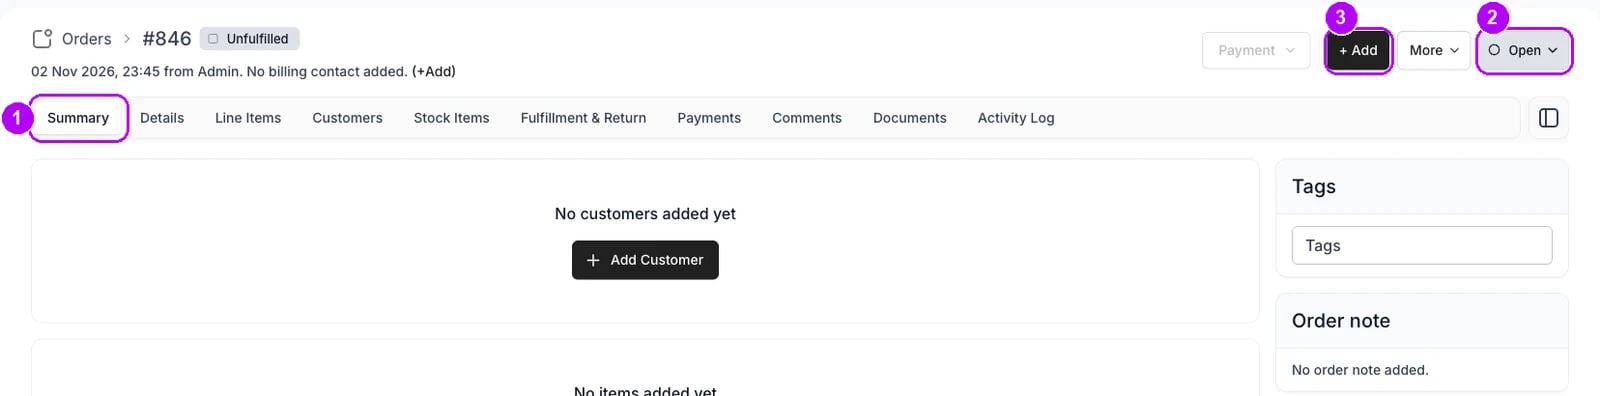
4
Add the customer
Click the Customer tab. Enter the customer’s name in Search existing customer base, tick their row and click Add selected at the bottom right. The panel closes, and the Summary tab shows the customer’s card.For someone new, click Create new customer at the bottom left, fill in the Add customer panel and click Save.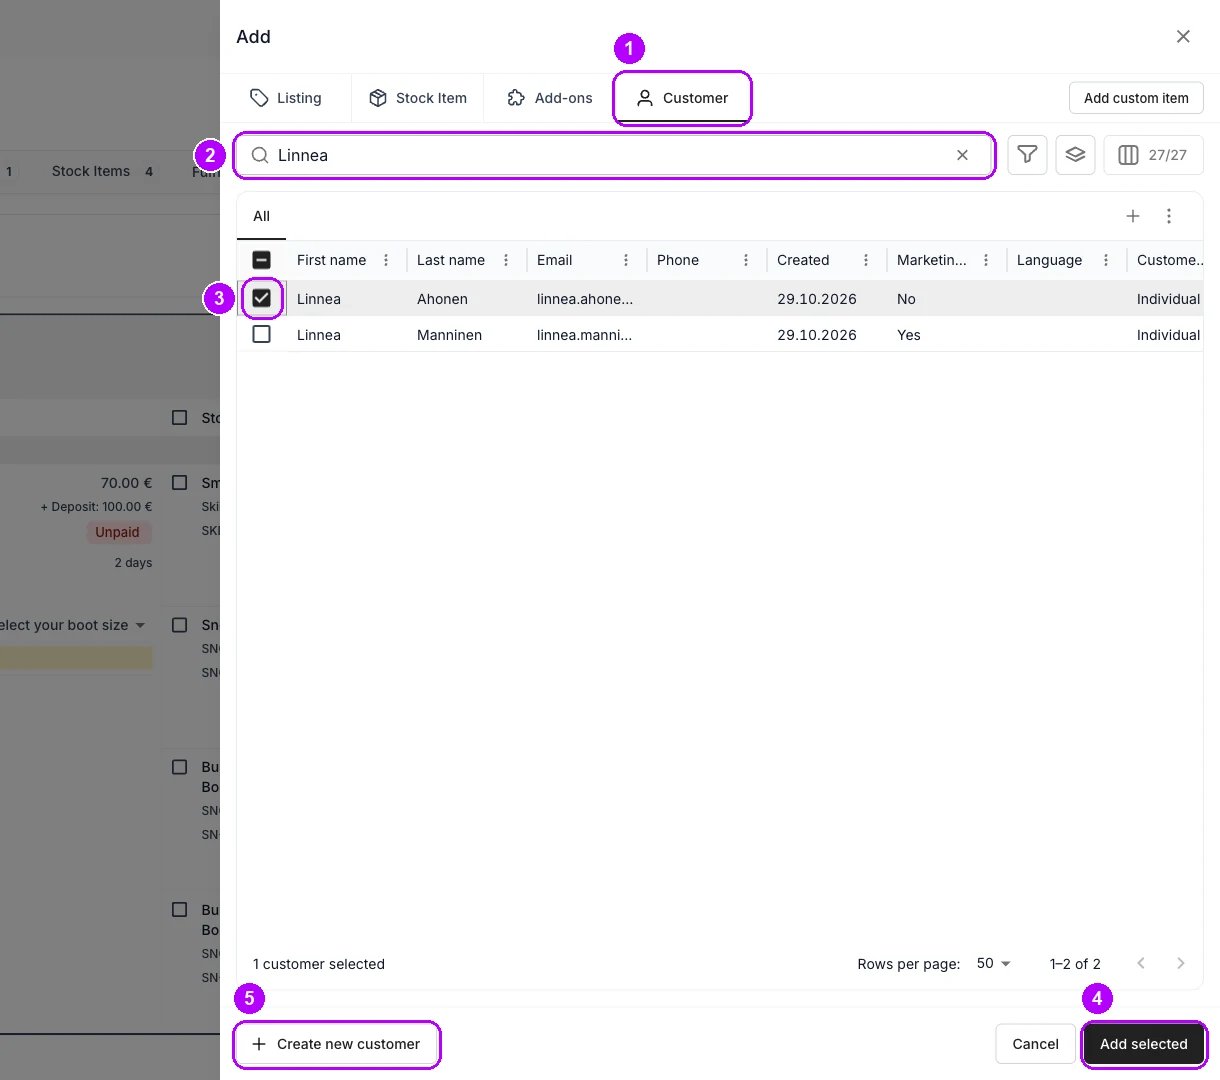
5
Set the dates
Click + Add again. The Add panel opens on its Listing tab. Under Purchase dates at the top left, pick the End date and time, and change Start if the order does not start now. For a sale, Start is enough.Each listing then shows how many are free over those dates, for example “Booking - 3 available”.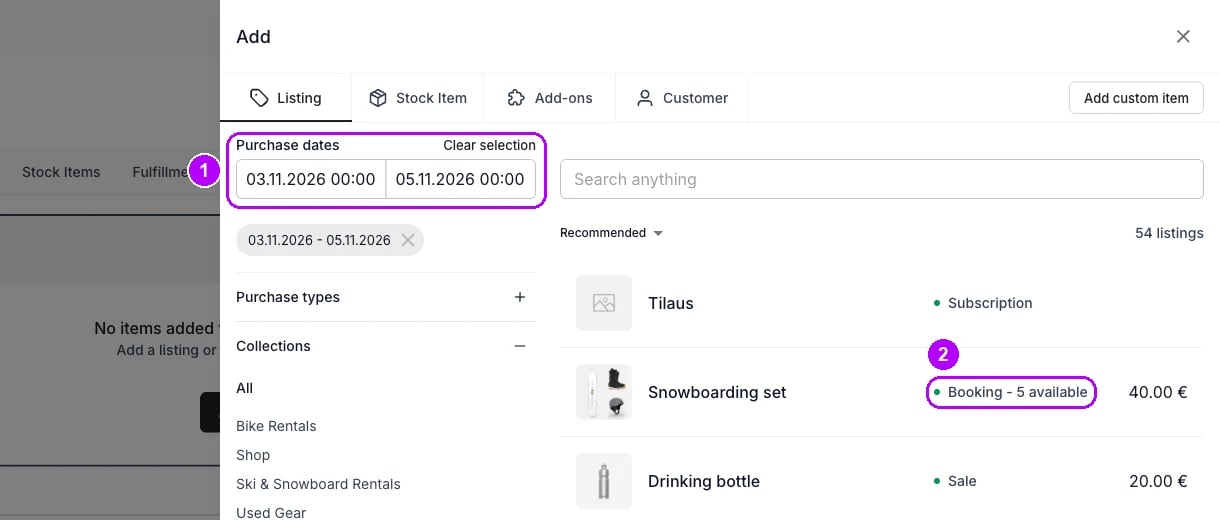
6
Pick the listing
Enter the listing’s name in Search anything at the top of the panel, then click the listing’s row. The Add Line Item panel opens on the dates you set, with the listing’s name in Name.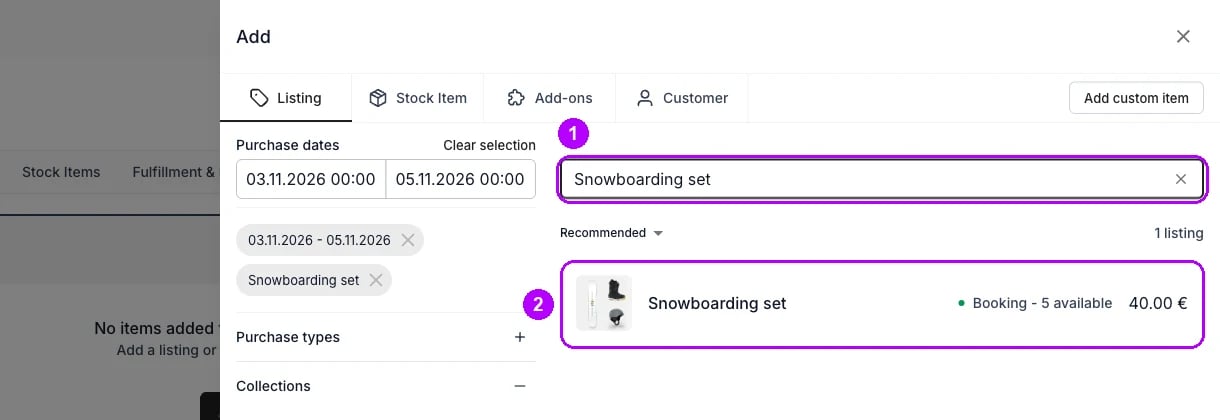
7
Choose how it is sold
Check Purchase Type below Name and any variant fields in the Add Line Item panel. It shows only for a listing sold more than one way, and it starts on Sale. Choose Booking to book the item for your dates, or keep Sale to sell it.Skip this step when the field is not there.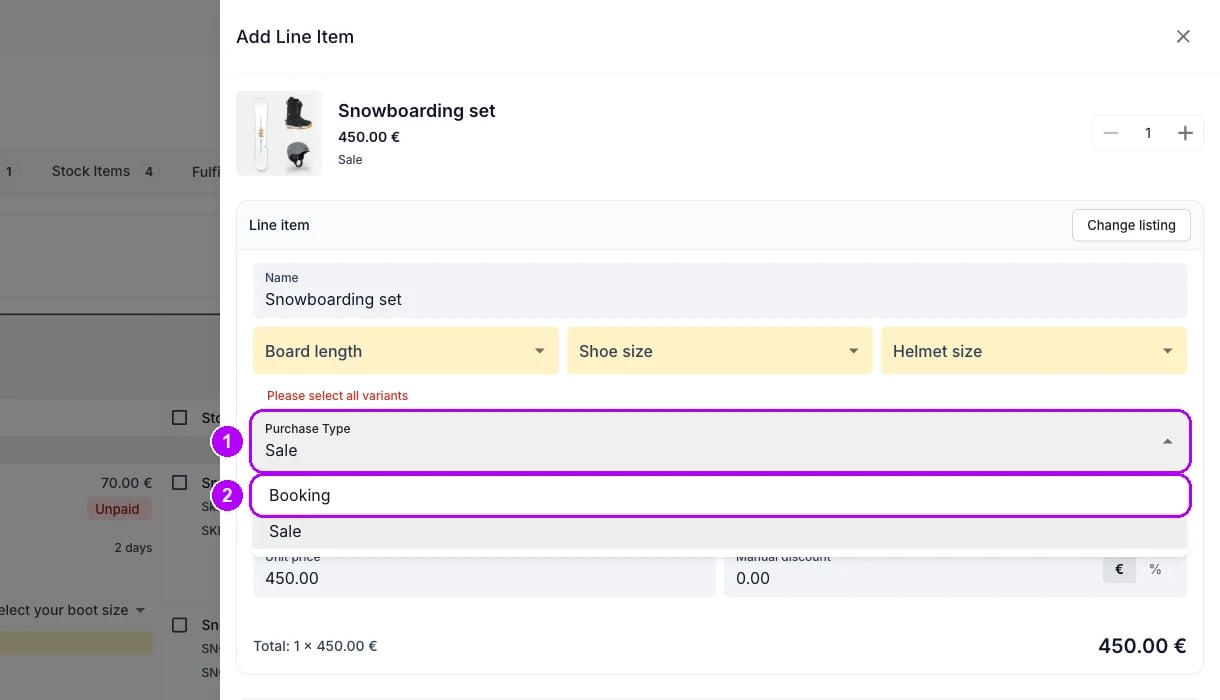
8
Pick the purchase option
Pick each variant first, such as a size, if the listing has them. For a booking, open Purchase option and pick the price that fits the period. It may already hold one. Unit price then shows the price for your dates.A sale has no Purchase option: its date field reads Sales date.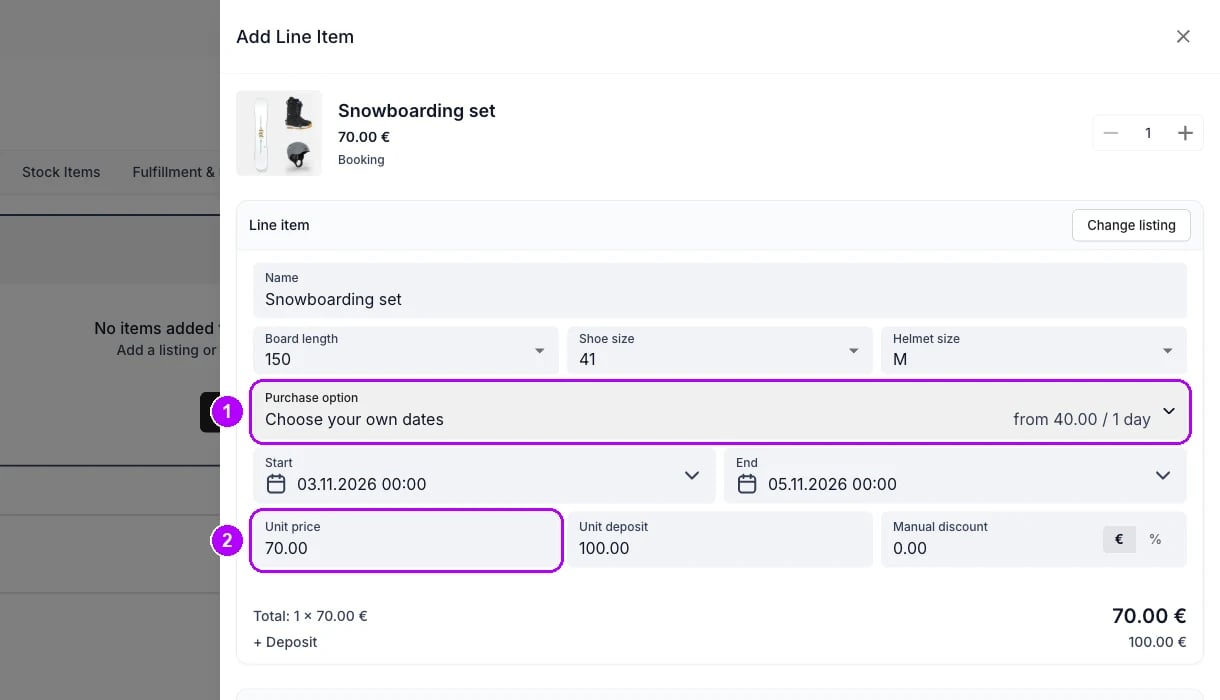
9
Add the line
Check Unit price and the total under it, and enter a Manual discount if you agreed one. Click Add at the bottom right. The panel closes, and the line shows on the customer’s card with its dates and price.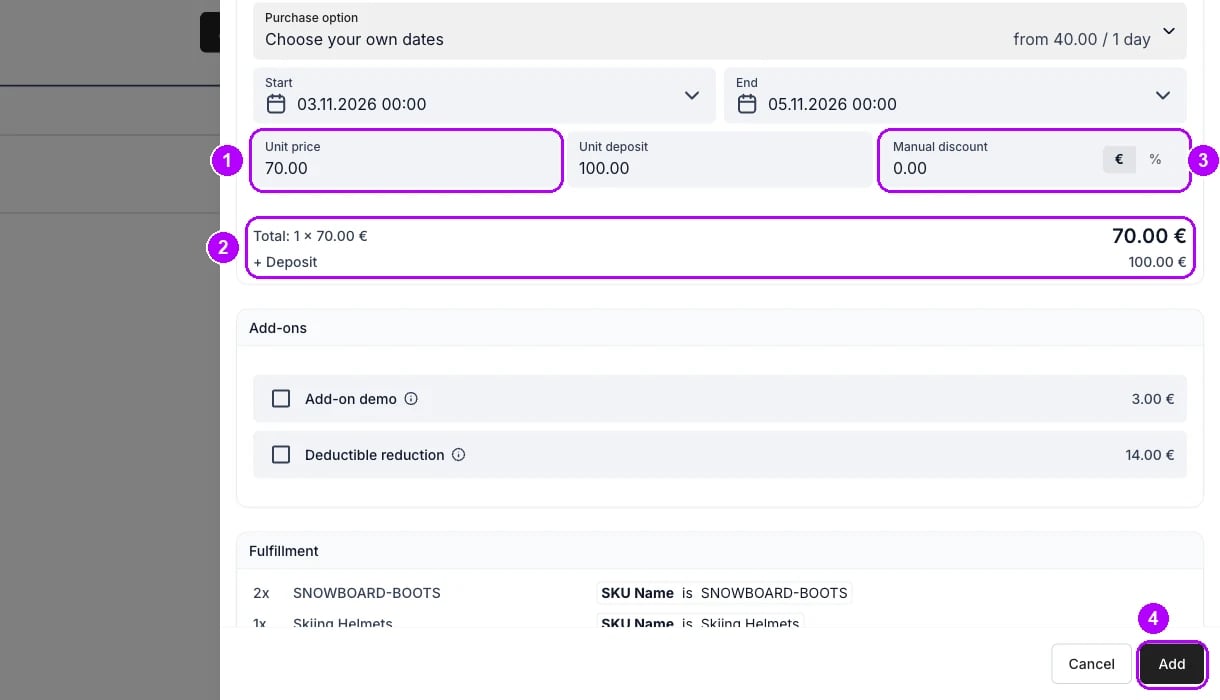
10
Check the order
Check the Summary tab. The status chip still reads Open, the customer’s card lists the line, and the Payments card on the right shows the order total with its chip at Unpaid.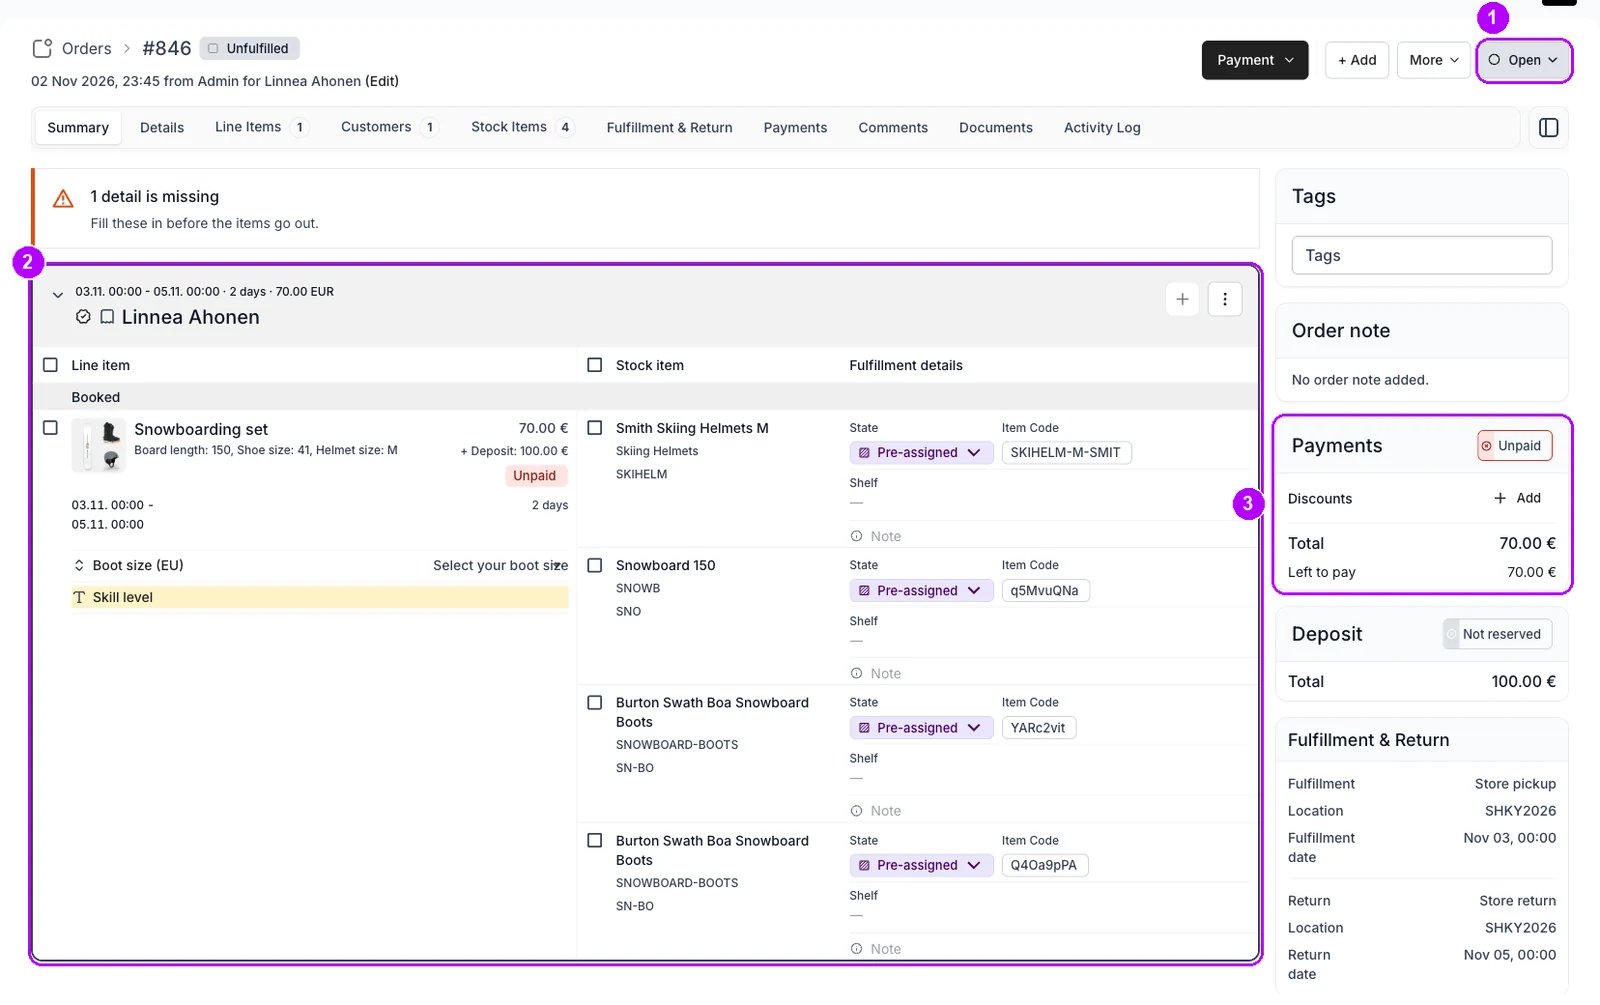
How do I know it worked?
- The status chip reads Open in the top-right corner of the order.
- The customer’s card on the Summary tab lists the line, with its dates and price.
- The customer is the billing contact. The line under the order reference reads “for” and the customer’s name, because the first customer you add becomes the billing contact.
- The Payments card reads Unpaid, with the order total, until payment is taken.
- The order is listed in the Orders table under its reference.
Troubleshooting / common pitfalls
Create Order does nothing, or is not there
Create Order does nothing, or is not there
With no location selected in the top-left corner, the button has nowhere to create the order: select one and click again. With no button at all, your role lacks Create and edit orders or hides the action. See Order Lifecycle.
Add stays greyed out in Add Line Item
Add stays greyed out in Add Line Item
A field the line needs is still highlighted in yellow, such as Purchase option or End, or the listing is not available for those dates. See Order Lifecycle.
The Fulfillment card reads No fulfillment rules configured
The Fulfillment card reads No fulfillment rules configured
The listing has no stock rules, so the line reserves no unit and availability is unlimited. Fix it on the listing, not on the order. See Control what stock a listing draws from.
Related articles
Order Lifecycle
The statuses an order moves through, and what each move does.
Taking an order
Create an order, start it and complete it.
Send a checkout link
Let the customer pay what the order owes online.
Record a manual payment
Record cash or a card payment taken at the counter.
Start an order
Hand the items over by moving the order to In progress.
Complete an order
Close the order once nothing is left to do on it.