

Open in TWICE Admin
settings/organization/locations
Prerequisites
Have ready before you start:
- The latest time you take returns on each weekday, for example 22:00.
- Where the customer leaves the item and keys after closing, such as a drop box or a key safe, in the words you want them to read.
The walkthrough
1
Open the location
Open Settings → Locations. Under All locations, open the menu at the right end of the location’s row and choose Edit. The Edit Location page opens full screen, with its tabs along the top.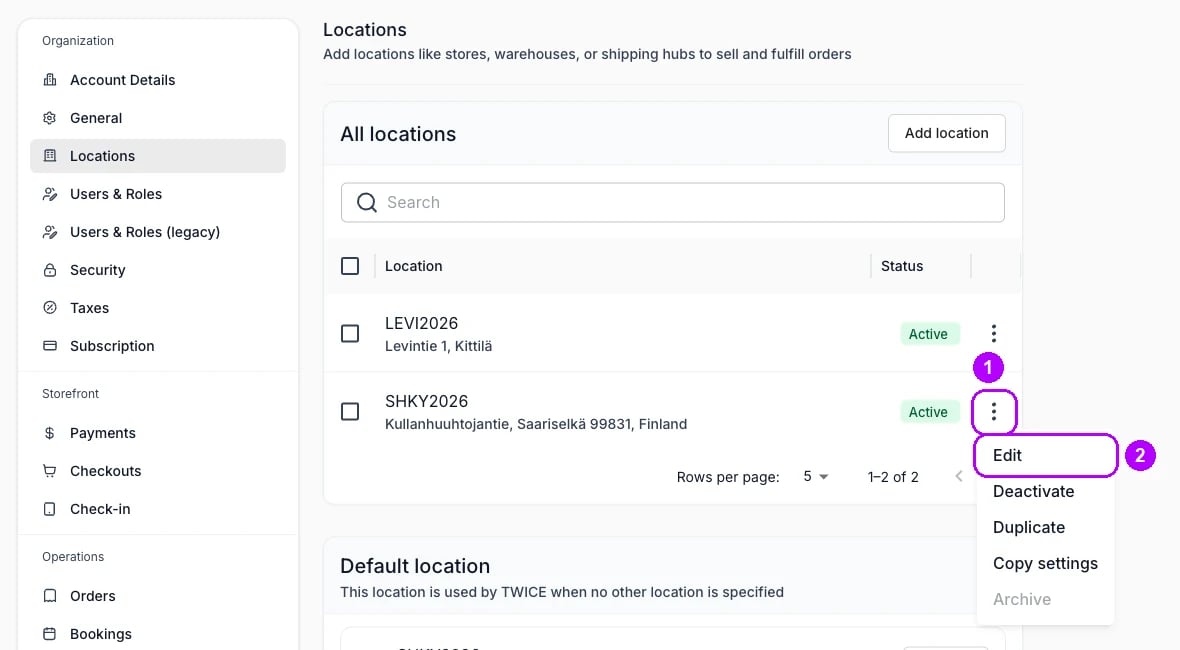
2
Open the Fulfillment tab
Click Fulfillment in the tabs along the top, and scroll to the Return hours card, the last card on the tab. Same as opening hours is chosen on it unless someone changed it.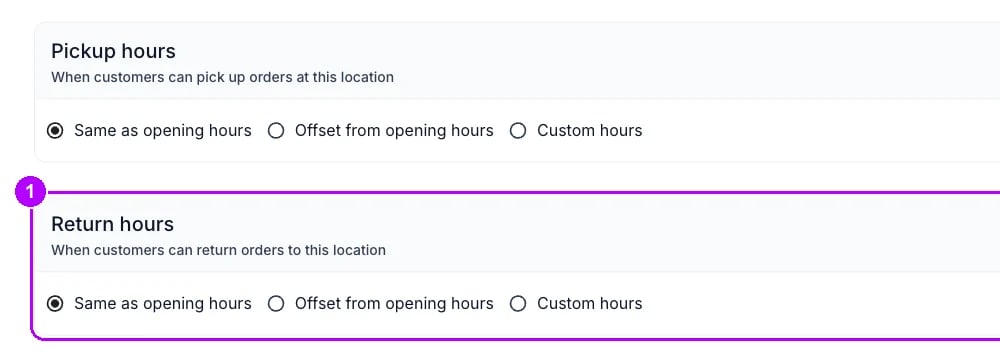
3
Choose Custom hours
On the Return hours card, choose Custom hours. Three cards open under it: Regular, Exception dates and Seasonal hours. The first time, Regular starts as a copy of the location’s opening hours. Leave Pickup hours as it is.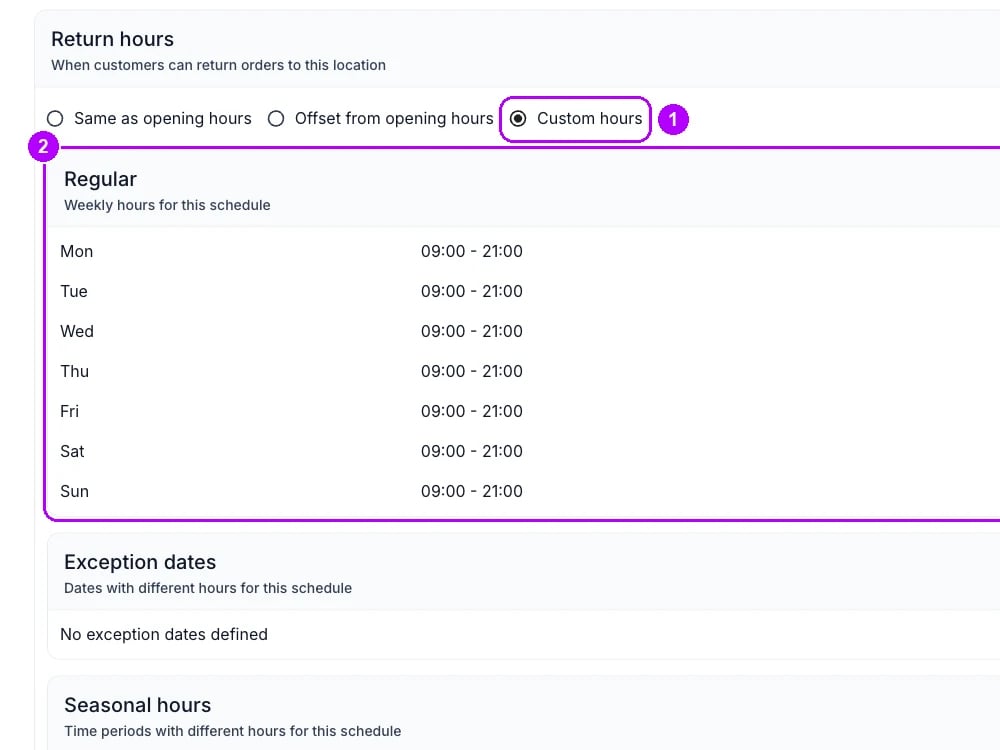
4
Open the regular return hours
Click Edit on the Regular card. A panel titled Regular opens on the right, with one row per weekday: a tick box with the day’s name, then a start time and an end time.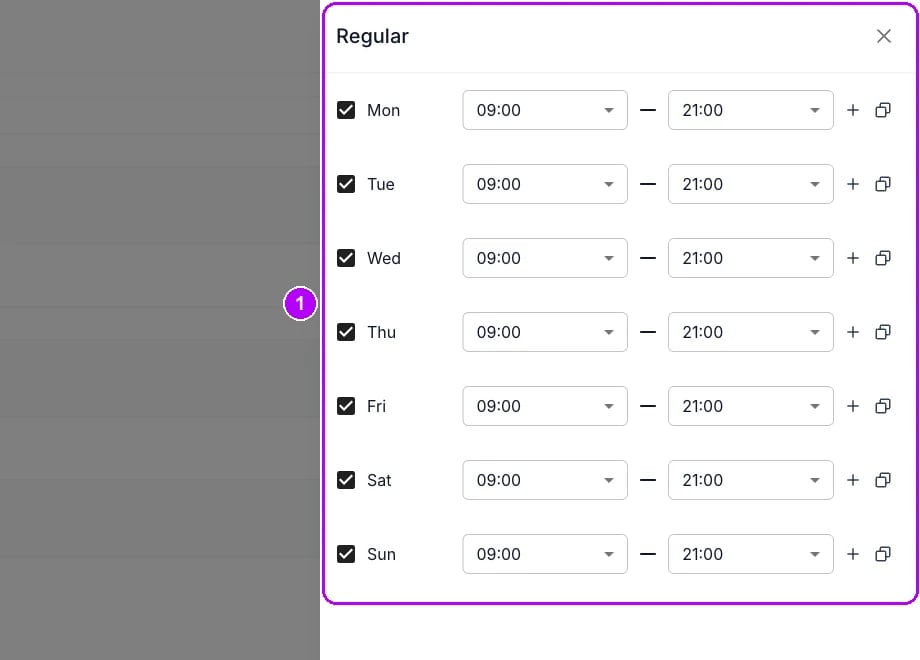
5
Set the later end times
Open the end time on each weekday and pick the last time you take returns, for example 22:00. To copy a day, click the copy icon at the end of its row, tick the days under Copy times to and click Apply. Tick a day the store is closed to take returns on it too.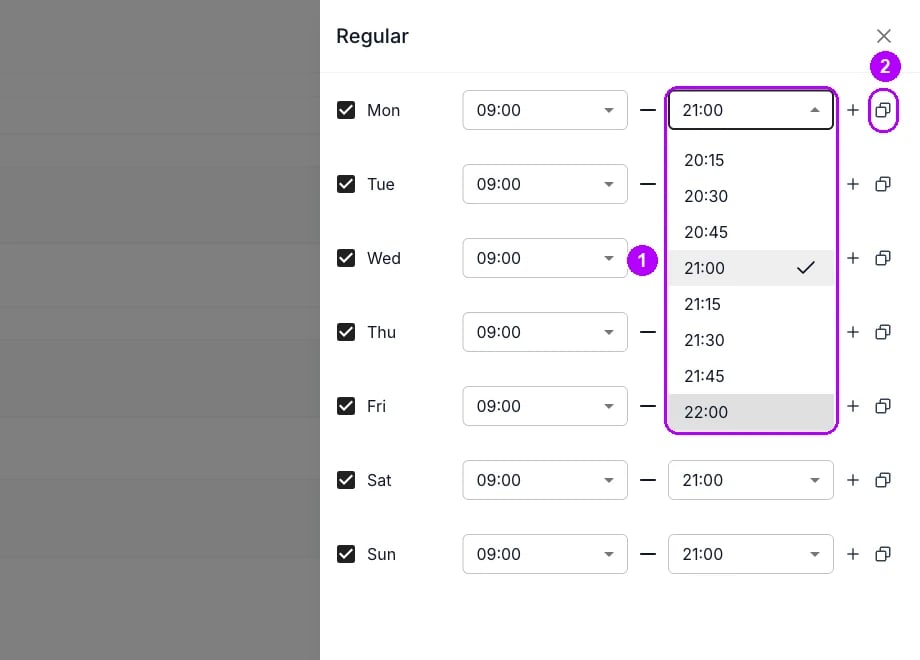
6
Save the panel
Click Save at the bottom of the panel. The panel closes, and the Regular card lists the new end times. Nothing is stored until you save the location.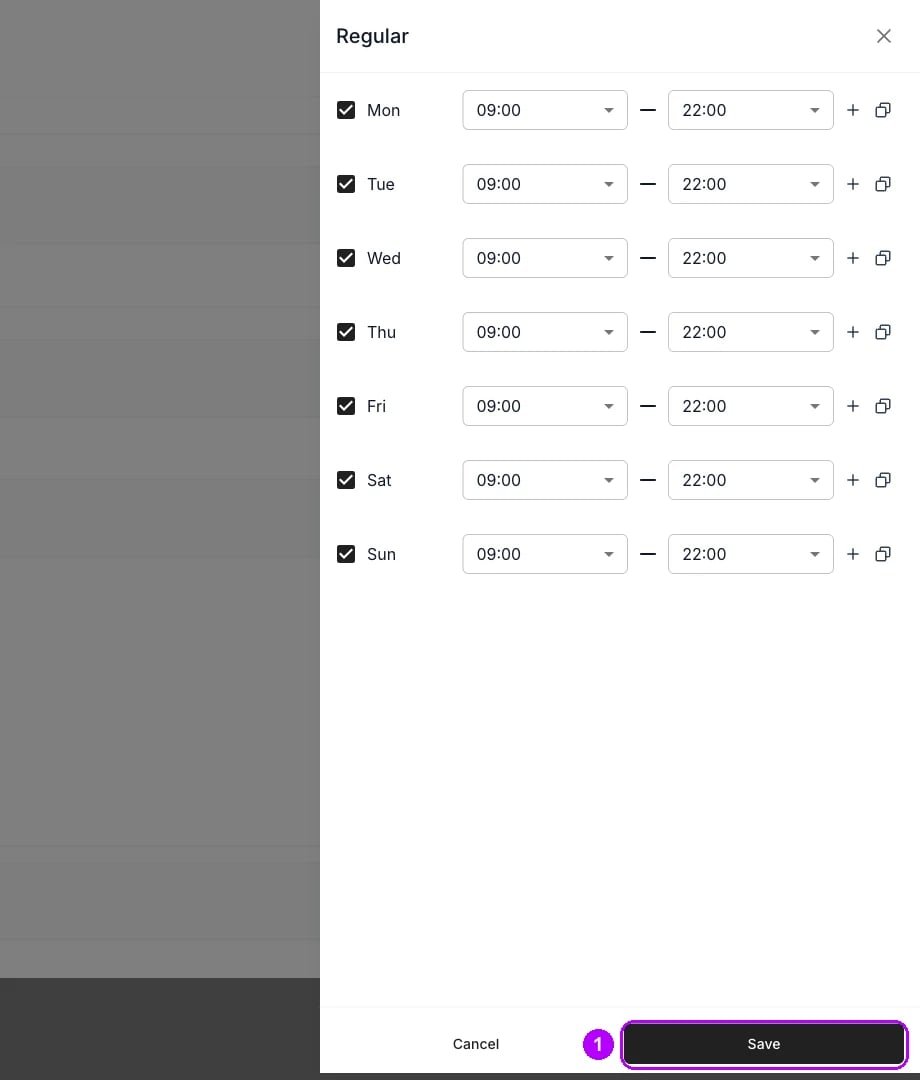
7
Save the location
Click Save in the top-right corner of the Edit Location page. The storefront now offers return times up to the new end on each day, and a booking whose return falls after closing goes through checkout.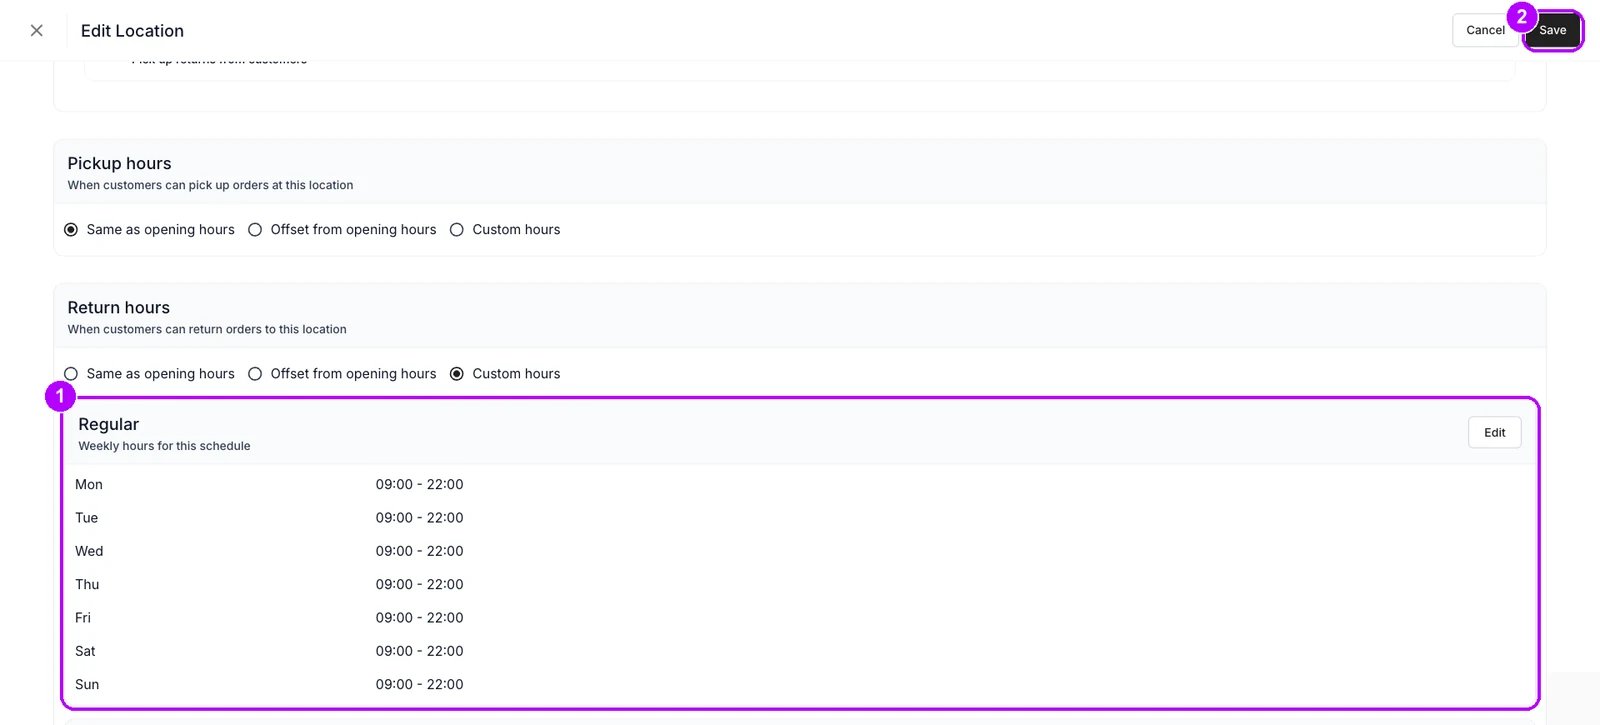
8
Open the order confirmation email
Open Settings → Emails and click Storefront order confirmation under Customer notifications. It is the email a customer gets after ordering on the storefront. The email editor opens full screen.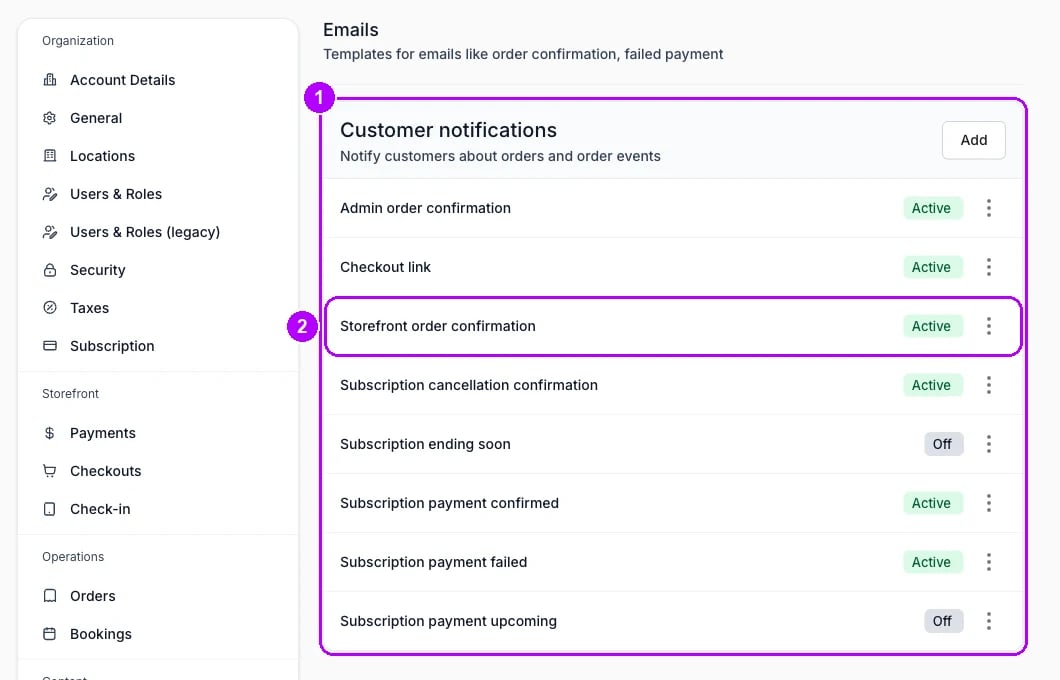
9
Open the content
Click Content in the list on the left of the editor. The email’s HTML opens, with a preview of the email beside it.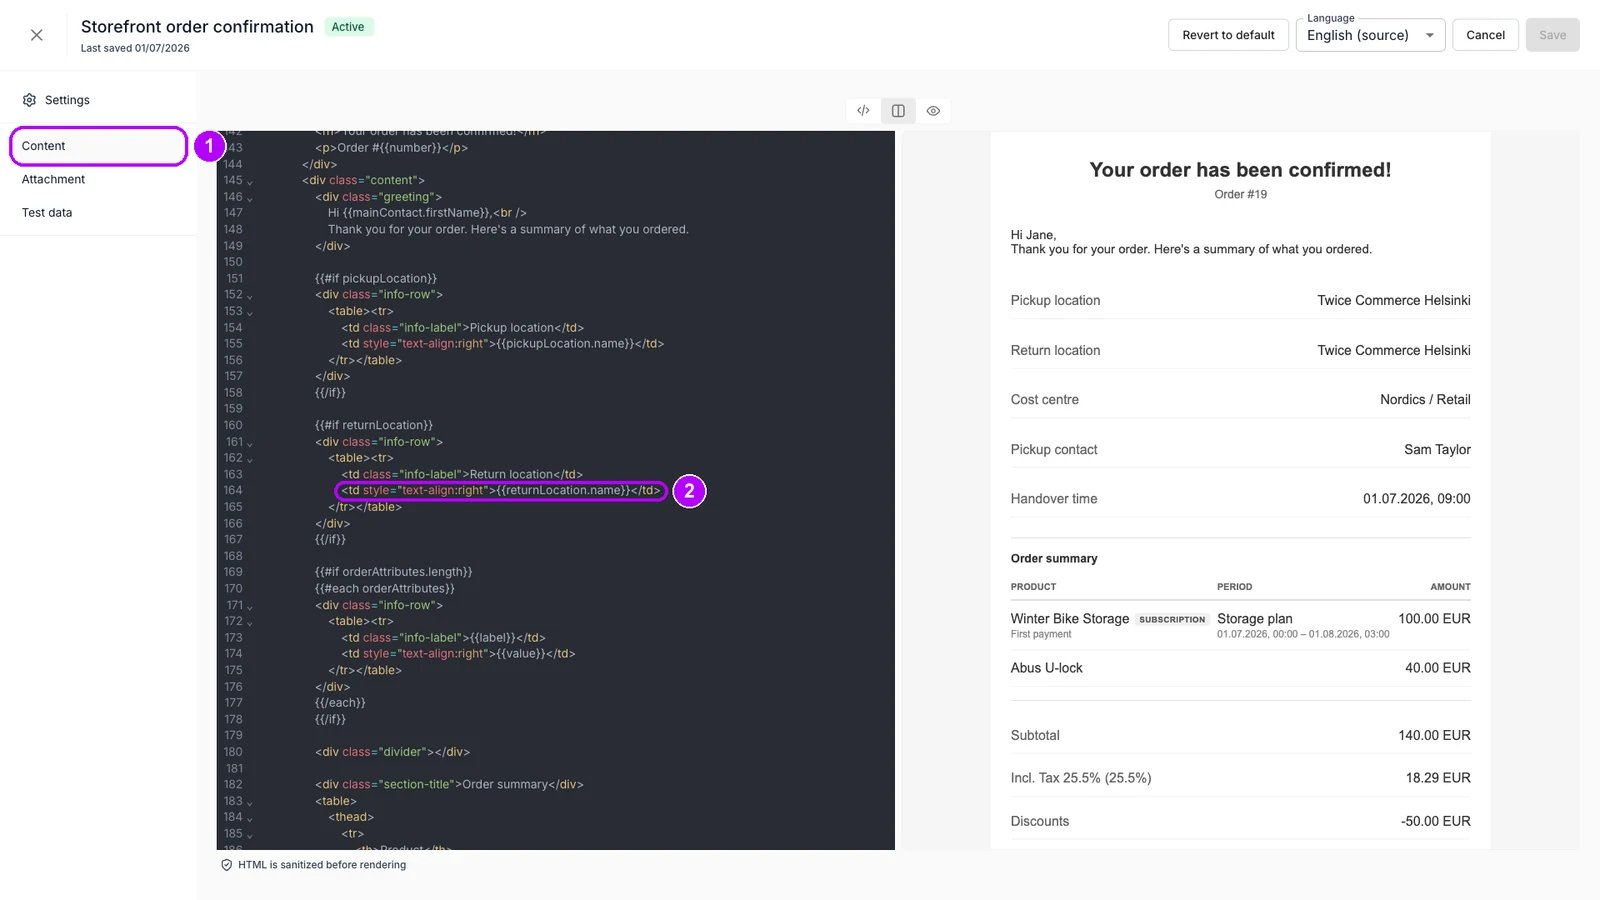
10
Add the return instructions
Find 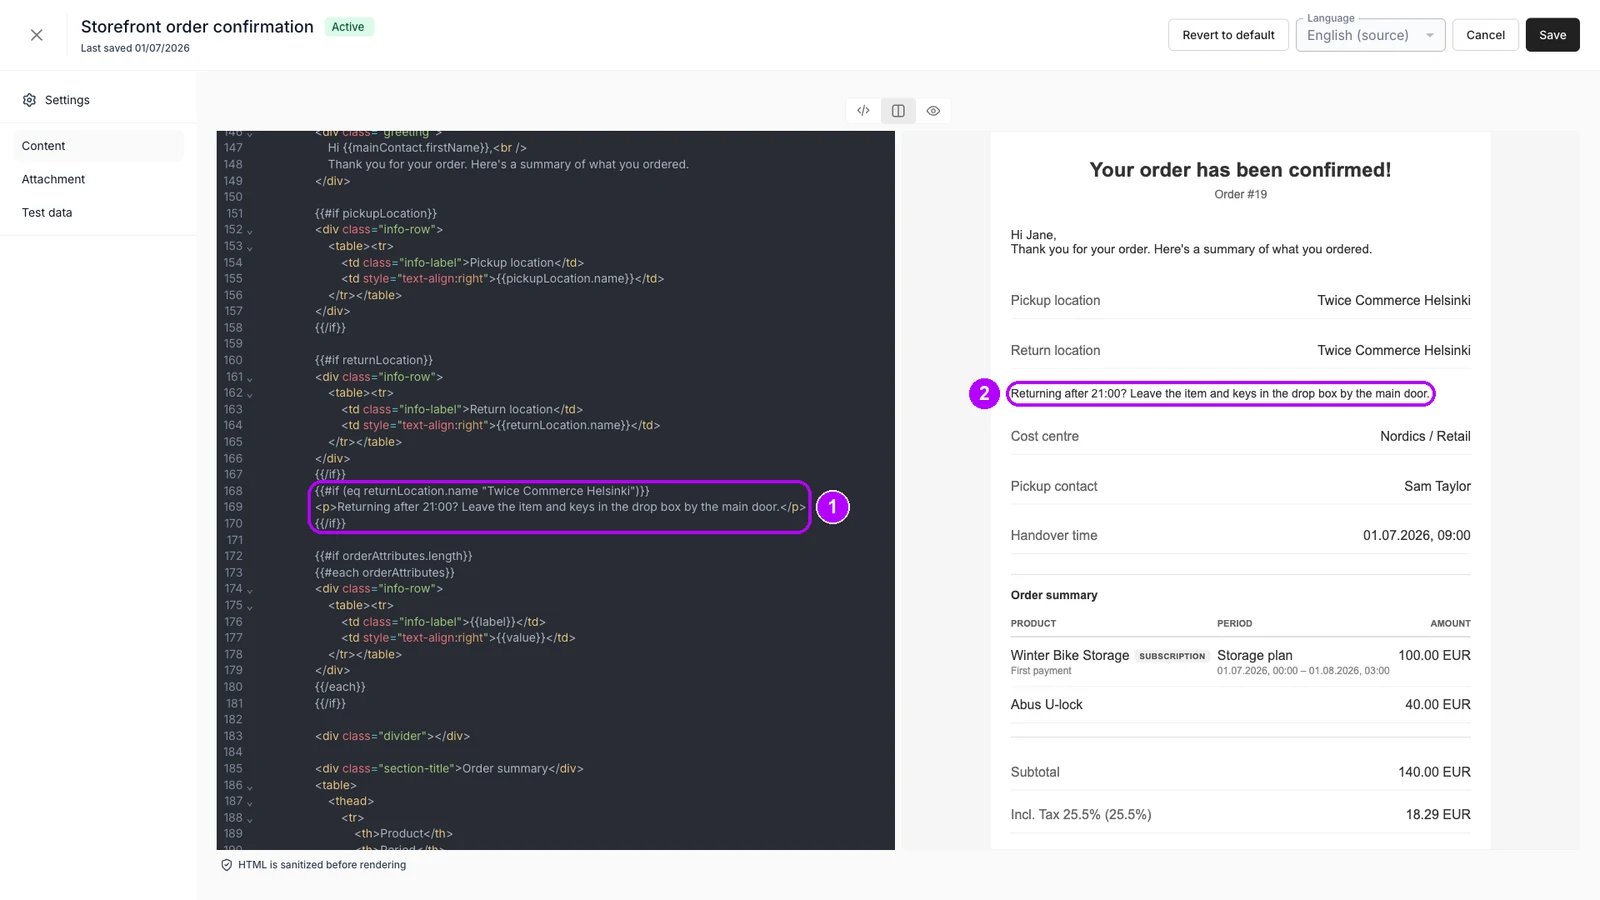
{{returnLocation.name}} in the HTML and paste a paragraph after the {{/if}} that closes its row. The email cannot check the return time, so word it for the customer to apply to themselves. Put the location’s name between the quotes, as it reads under All locations. The preview shows sample data until you pick one of this location’s orders under Test data.11
Save the email
Click Save in the top-right corner of the editor. The template keeps its Active chip, and the next storefront order returning to this location carries the paragraph. Repeat the paragraph in any language you edited this email in before: choose it under Language at the top.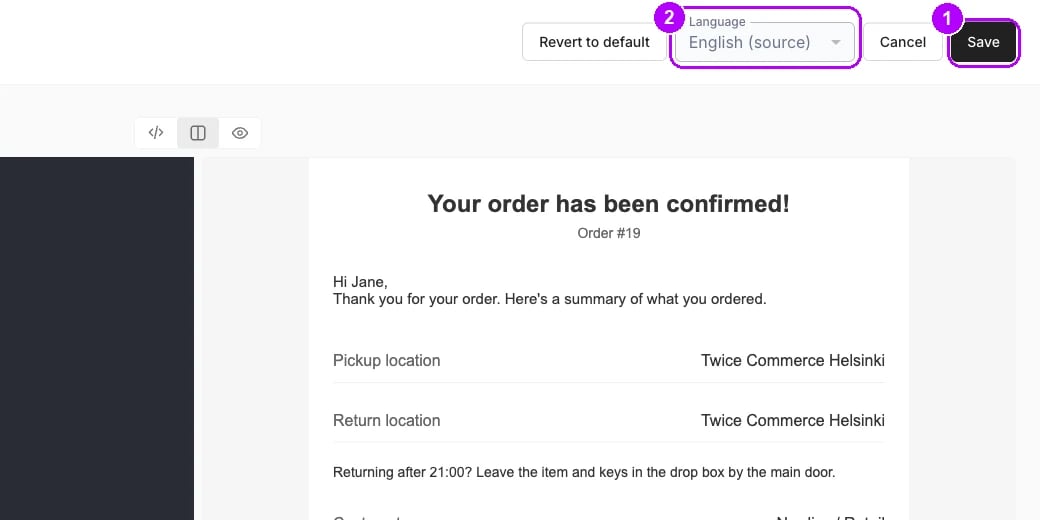
How do I know it worked?
- Return hours reads Custom hours on the location’s Fulfillment tab, and the Regular card lists the later end times.
- The storefront offers the later return times for a booking at this location, and accepts a booking whose return falls after closing.
- A test order with a return after closing gets an order confirmation with your paragraph under Return location.
Troubleshooting / common pitfalls
One listing still stops returns at closing time
One listing still stops returns at closing time
Its End times on the Limits tab are narrower than the location’s return hours, and the tighter of the two wins. Widen them, or keep them to hold that listing to opening hours. See Set purchase and booking limits.
Returns are offered on a day you are closed
Returns are offered on a day you are closed
Custom hours keep their own Exception dates and Seasonal hours, so a closure on the opening hours does not reach returns. Add the closure on the Return hours card too. See Close a location for a few days.
An order you took in admin got no instructions
An order you took in admin got no instructions
The storefront order confirmation goes out only for storefront orders, and staff can book any return time in admin. Add the same paragraph to Admin order confirmation and send it from the order by hand. See Emails.
Related articles
Locations
How pickup and return hours gate the storefront, and how Custom hours differ.
Emails
System templates, template variables, and sending a template by hand.
Set purchase and booking limits
Start and end times per listing, inside the location’s hours.
Settings - Locations
Every tab on a location, opening hours and fulfillment included.