

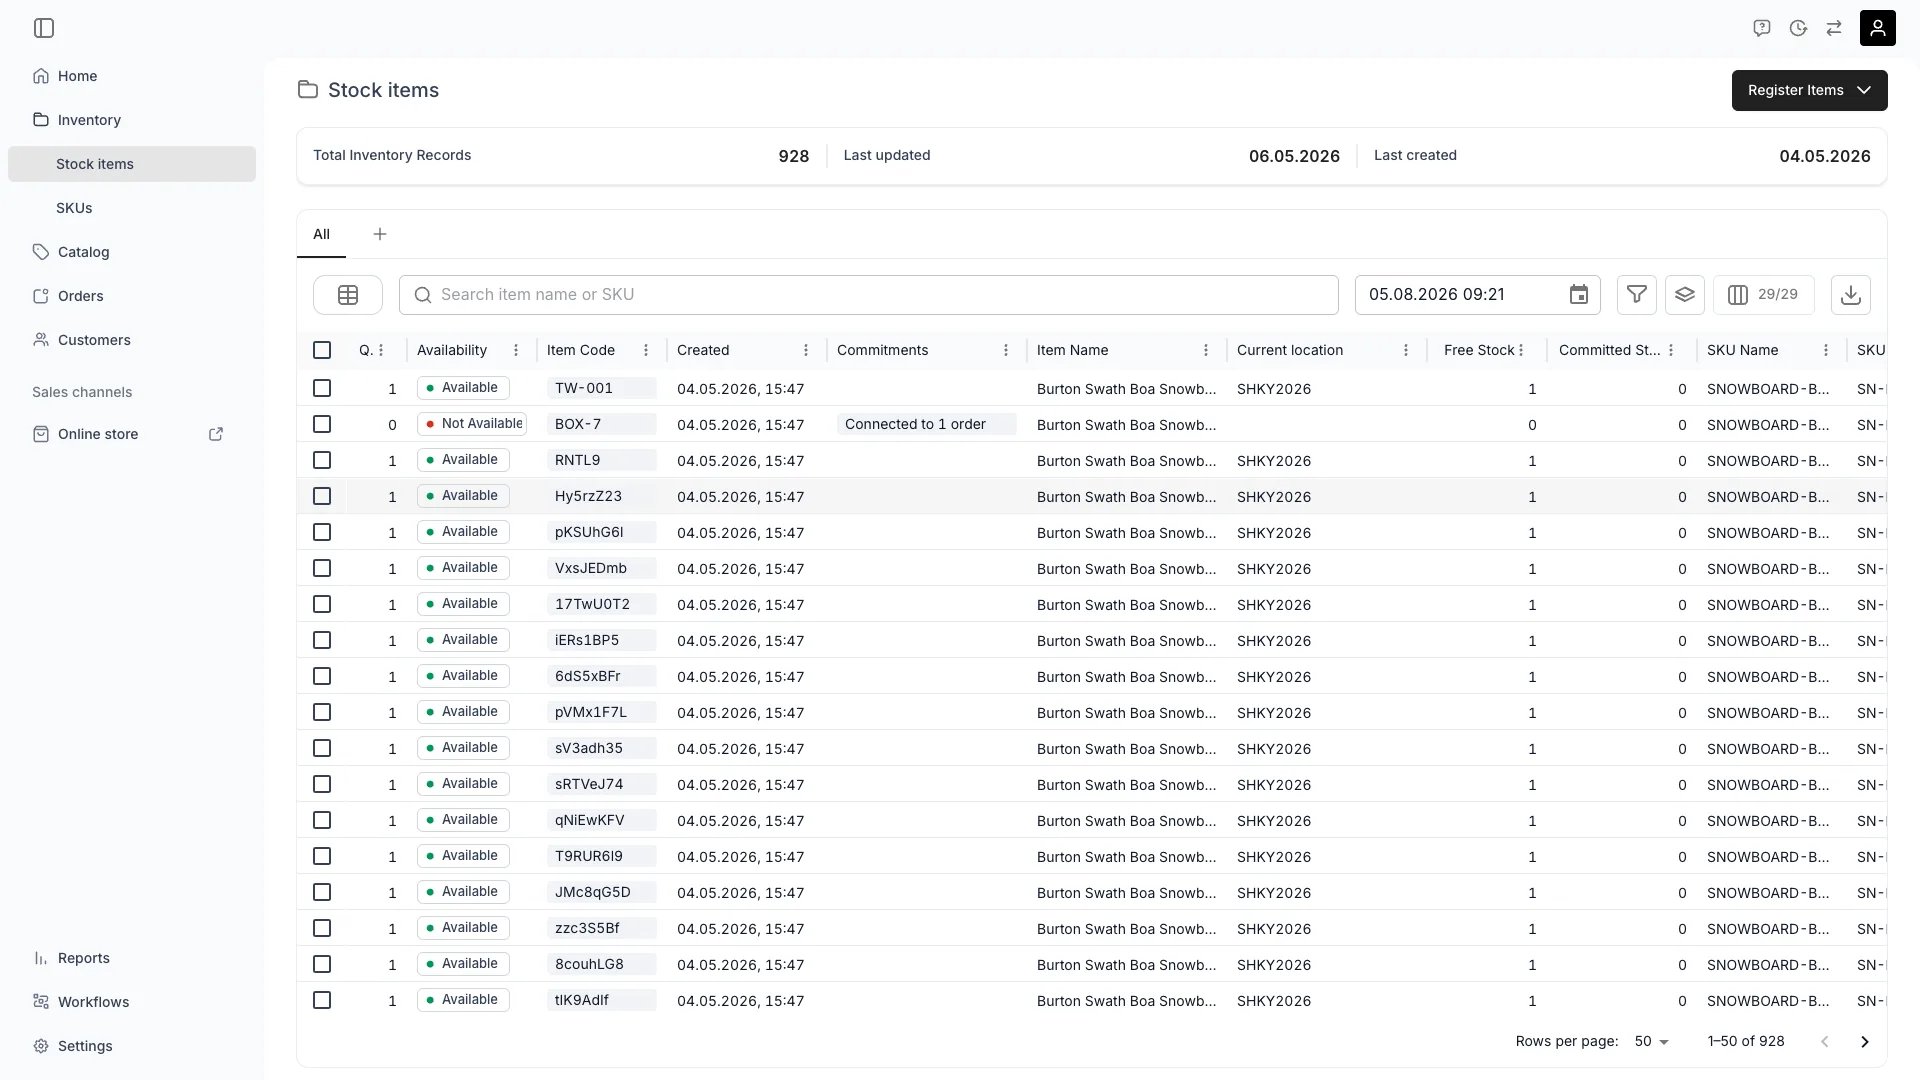
Inventory > Stock Items
Open in TWICE Admin
inventory/stock-items
Prerequisites
Before you start, decide:
- One row per item, or per group? A row’s Quantity decides, and the default is not the one the registration dialog uses — see the walkthrough.
- Which columns are already attributes. Existing attributes are offered as columns automatically; anything else you map becomes a new attribute.
- Exact location names. Match them to your existing locations character for character.
- Your account’s date format.
Available fromis parsed with it, not with ISO.
The columns
Only two columns are required. Everything else is optional, and every column can be mapped from a differently-named header in your file.
The importer matches common header spellings on its own:
qty and count map to Quantity, store and warehouse to Location, sku to SKU Code, title and label to Item Name, id and identifier to Code. You can correct any of its guesses by hand.
The walkthrough
1
Open the Stock Items view
Select Inventory → Stock items in the sidebar.
2
Start the import
Select Register Items in the top right, then Import CSV.
3
Upload
Choose your file. The wizard runs through five steps — Upload, Select header, Match Columns, Validate data, Complete.
4
Select the header row
Point the importer at the row holding your column names, so a title block or blank rows above your data do not become items.
5
Match the columns
Map each column in your file to a TWICE column. Item Name and Location must both be mapped before you can continue.Any column you do not map to a built-in field can be brought in as a new attribute. You pick its attribute group and format at this point, and the attribute is created on your account — so a stray column you leave mapped adds a permanent attribute you will have to clean up later.
6
Decide how each row is tracked
This is the step that surprises people. A row’s Quantity decides whether you get one record or several, and the CSV import behaves the opposite way to the registration dialog:
The registration dialog defaults to tracking individually and creates one record per unit. The import never does: any row with a quantity above 1 becomes a single pooled record. If you need each unit tracked separately — its own code, history and costs — give each unit its own row with a quantity of 1.
7
Validate the data
The importer checks every cell and reports the failures. Fix them in the wizard or in your file and re-upload.
8
Complete the import
Run it. Large files are sent in batches of 1,000 rows, so a big import takes a moment.
How do I know it worked?
Open Inventory → Stock items. The new rows are in the table, and Total Inventory Records and Last created in the header reflect the import. Then check what the import created alongside the items:- SKUs — any SKU name or code that did not exist is now on Inventory → SKUs.
- Locations — any location name that did not exist is now in Settings → Locations, with an empty address and no opening hours.
- Attributes — columns you brought in as new attributes are now on Settings → Attributes & Tags.
Troubleshooting / common pitfalls
I imported 50 units but only got one record
I imported 50 units but only got one record
Cause: the row’s Quantity was 50, and the import treats a quantity above 1 as a single pooled record — the opposite of the registration dialog’s default.Solution: give each unit its own row with a quantity of 1, then re-import. Archive the pooled record you no longer want.Read more: Inventory Tracking
A typo in the Location column created a new location
A typo in the Location column created a new location
When this happens: the importer accepts any location name and creates the ones it does not recognise. “Helsinki Store” and “Helsinki store ” are two different locations to it.What to do: check Settings → Locations after any import. A location created this way:
- Has an empty address and no opening hours.
- Inherits its timezone from your first existing location, so it will not behave like a real one until you fill it in.
Code already exists in inventory
Code already exists in inventory
Cause: item codes are unique across your whole account, and the importer checks your file against existing inventory as well as against itself.Solution: remove or change the duplicate codes, or leave the Code column out entirely and let TWICE generate codes for you.
Invalid date format
Invalid date format
Cause: Available from is parsed using your account’s date format, not ISO. A file written as
2026-03-14 fails on an account set to DD/MM/YYYY.Solution: match the file to your account’s format, or change the format in Settings → General before importing.A column I did not want became an attribute
A column I did not want became an attribute
When this happens: every unmapped column offered as a new attribute is created on your account, not just on the imported rows.What to do: delete it in Settings → Attributes & Tags. Skip the column at the Match Columns step next time instead of mapping it.
"Something went wrong" and only part of the file imported
"Something went wrong" and only part of the file imported
When this happens: the import sends rows in batches. If a later batch fails, earlier batches have already been created, so you can be left with a partial import.What to do: check the table for what landed before re-running, and filter by Created to find the partial batch. A Member hitting a new location name is the most common cause — see the permissions above.
Related articles
Register stock items
The dialog route, one item or a handful at a time.
Inventory Tracking
Serialized versus pooled tracking, and when each is right.
SKUs
The product definitions your imported items link to.
Attributes
How attribute formats and groups work before you create more.