> ## Documentation Index
> Fetch the complete documentation index at: https://www.twicecommerce.com/docs/llms.txt
> Use this file to discover all available pages before exploring further.
# How to design the storefront in the theme editor
> Work the theme editor in the order that saves rework — global design tokens first, pages after — knowing that every save goes straight to the live storefront.
 online-store/themes
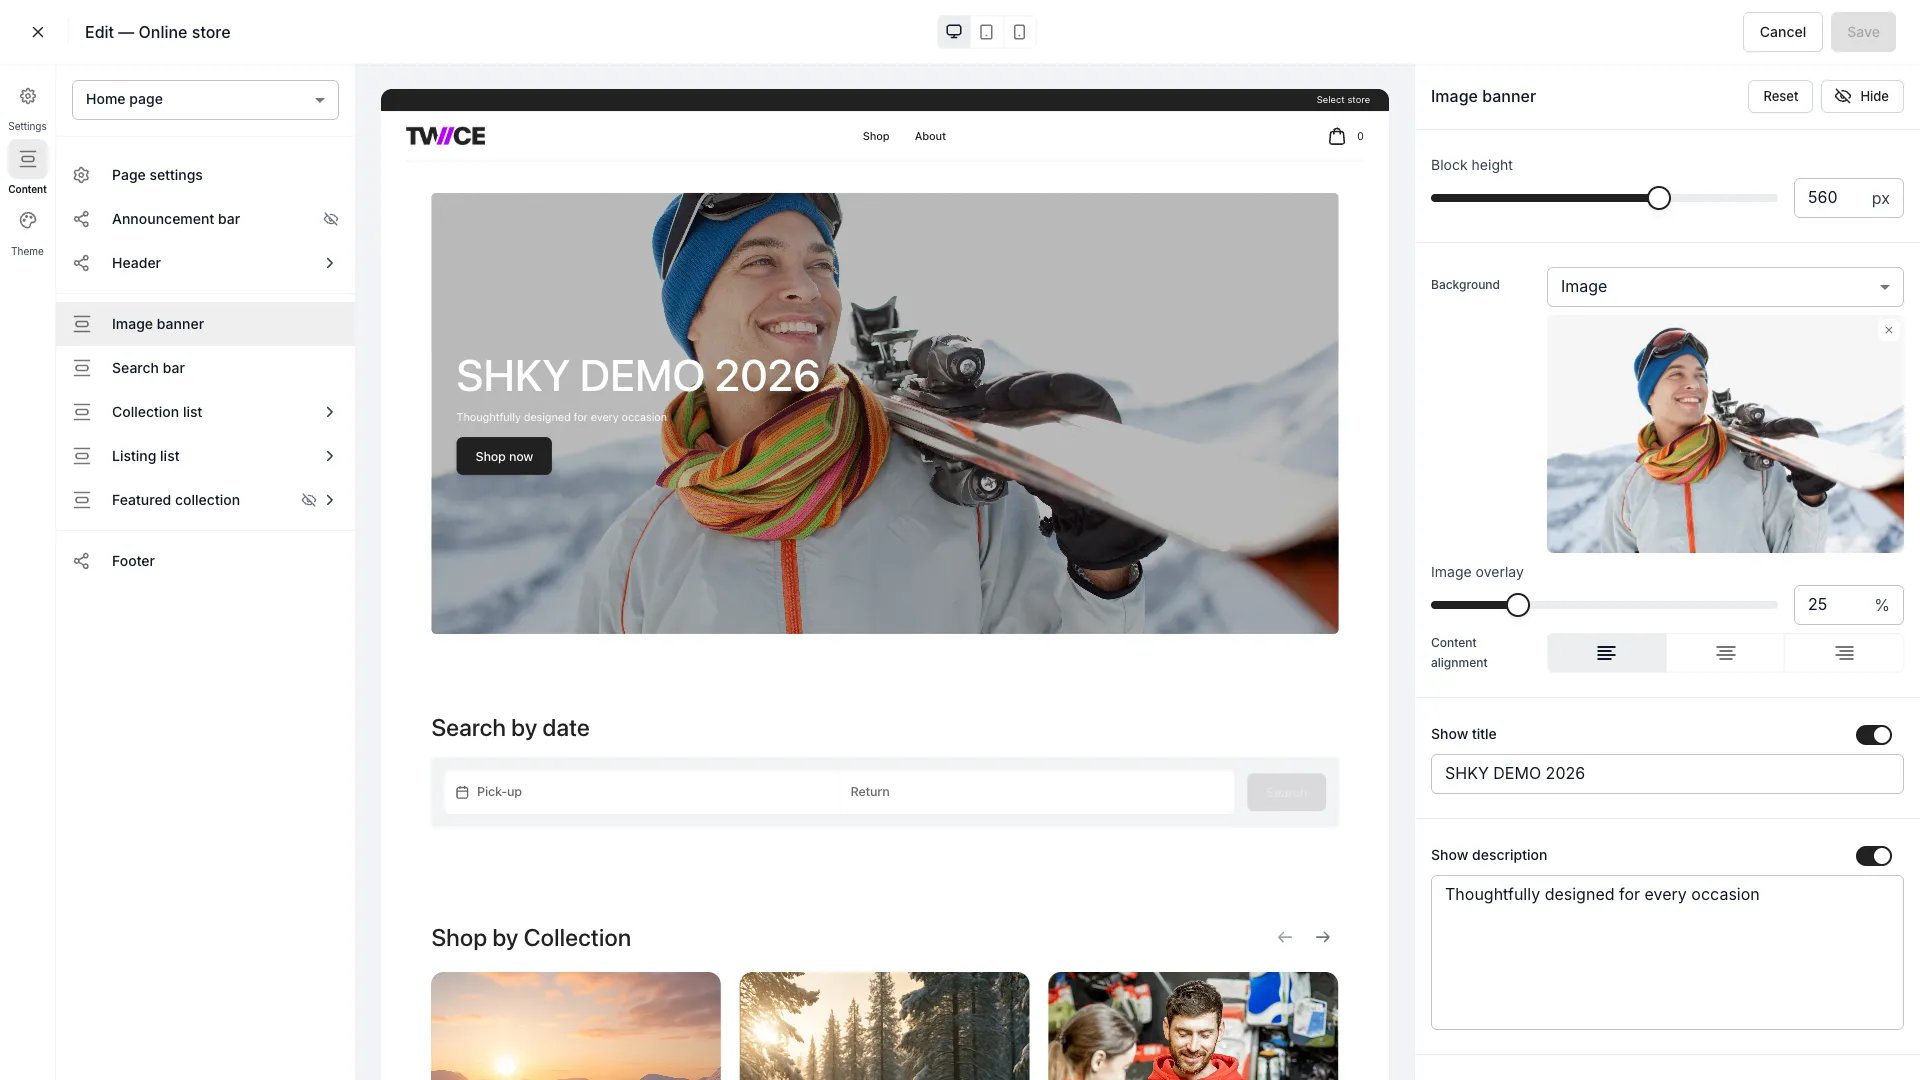
The theme editor has a lot of panels, and every one of them is already documented. What is not written down anywhere is the *order* to work in — and the order matters, because global settings overwrite the look of pages you have already tuned.
This guide is that sequence. It does not repeat the individual panels; each links to its own page.
## Prerequisites
**Required permissions:** `online_store:editor`, in view to open the editor and manage to change anything. **All four system roles hold every operation on it** — Owner, Admin, Manager and Member can all edit the storefront's design. See [Users & Roles](/docs/settings/users-roles).
**Before you start, understand one thing:**
**Saving publishes.** There is no draft, no publish step and no theme library — your account has exactly one storefront configuration and the editor edits it in place. Anything you save is live for customers immediately. Plan the work into sittings you can finish rather than leaving a half-changed design saved.
## The Walkthrough
From **Online Store → Themes**, the single card shows desktop and mobile previews and your storefront URL. **Edit** opens the editor.
There is no theme to pick and nothing to duplicate — one configuration, edited directly. The consequence is the whole shape of this guide: you cannot stage a redesign and release it in one go, so work top-down and save at points where the storefront is coherent.
If you close the editor with unsaved changes, a dialog offers **Save changes** or **Discard**. Discard is the only undo — there is no version history to roll back to.
**Theme** mode holds the settings that apply storewide. Do these before touching any page, because they change how every page already looks:
| Do this first | Panel |
| ------------------------- | ------------------------------------------------------------------------------------------------------------------------------------------ |
| Overall style and density | [Theme style](/docs/sales-channels/online-store/theme-editor/settings/theme-style) |
| Palette | [Colors](/docs/sales-channels/online-store/theme-editor/settings/colors) |
| Fonts and scale | [Typography](/docs/sales-channels/online-store/theme-editor/settings/typography) |
| Page width, spacing | [Layout](/docs/sales-channels/online-store/theme-editor/settings/layout) |
| Shape and emphasis | [Buttons](/docs/sales-channels/online-store/theme-editor/settings/buttons), [Inputs](/docs/sales-channels/online-store/theme-editor/settings/inputs) |
Getting these right first is what stops you re-tuning a home page twice. A colour change late in the process silently re-renders every page and every card on it.
With the tokens set, move to the component panels. In rough order of how much a customer sees them:
* [Listings card](/docs/sales-channels/online-store/theme-editor/settings/listings-card) and [Collection card](/docs/sales-channels/online-store/theme-editor/settings/collection-card) — the repeated units that make up most of a storefront.
* [Header bar](/docs/sales-channels/online-store/theme-editor/settings/header-bar) and [Search bar](/docs/sales-channels/online-store/theme-editor/settings/search-bar) — on every page.
* [Calendar](/docs/sales-channels/online-store/theme-editor/settings/calendar) and [Availability indicator](/docs/sales-channels/online-store/theme-editor/settings/availability-indicator) — where a booking is actually made, so worth more attention than their size suggests.
* [Announcement bar](/docs/sales-channels/online-store/theme-editor/settings/announcement-bar), [Breadcrumbs](/docs/sales-channels/online-store/theme-editor/settings/breadcrumbs), [Variant pills](/docs/sales-channels/online-store/theme-editor/settings/variant-pills), [Filter section](/docs/sales-channels/online-store/theme-editor/settings/filter-section) — the finishing pass.
The full panel list is on the [Theme Editor](/docs/sales-channels/online-store/theme-editor/overview) page.
Two things people hunt for in the editor and do not find:
* **The logo image is set in Settings → General, not in the theme editor.** The editor's [Logo](/docs/sales-channels/online-store/theme-editor/settings/logo) panel controls how the logo is *displayed* — width and placement — and says so, pointing you to **Settings > General** to change the file itself.
* **The favicon *is* in the editor**, on the same Logo panel, displayed at 32 × 32 px.
Account-level branding settings exist separately from the storefront theme. The storefront's appearance is resolved from the theme settings you edit here, so if a colour is not what you expected, it came from this editor or from the theme's own default — not from an account branding field.
The editor previews desktop, tablet and mobile. Because saving is publishing, the preview is your only pre-flight — use all three.
Mobile is where storefront designs break, and it is where most customers are. Check the header, the listing card grid, and the calendar at mobile width specifically; those three carry the most layout risk.
[Custom CSS](/docs/sales-channels/online-store/theme-editor/settings/custom-css) is the escape hatch for what the visual editor does not expose.
Treat it as a last resort rather than a shortcut. CSS written against the current markup is the part of your storefront most likely to break silently when the storefront updates, and nothing will warn you — a panel setting will not.
**Reset entire theme** does what it says, and with no draft and no version history there is nothing to restore from. Only use it when you genuinely intend to start the design again.
## How do I know it worked?
* **The storefront matches the editor's preview**, at desktop and at mobile width.
* **Nothing looks half-finished to a customer**, because you saved at coherent points rather than mid-change.
* **A colour or font change shows up everywhere it should** — cards, header, calendar — rather than only on the page you were looking at.
* **Your logo is right**, which means you set it in Settings → General.
## Troubleshooting / Common Pitfalls
**There is no version history and no draft to fall back to.** Discard only works before saving.
**What to do:** change the settings back by hand. This is the reason to work top-down and save at coherent points — and the reason to note what a value was before you change it, on anything you are unsure about.
**It is not in the theme editor.** The Logo panel controls display width and placement, and points you at **Settings > General** for the image itself.
**What to do:** set the file in Settings → General, then come back to the editor to size and place it.
**Expected — that is the order problem this guide exists to prevent.** Theme tokens apply storewide and re-render every page.
**What to do:** finish the global tokens before per-page work. If you are already past that, re-check the pages you tuned early rather than assuming they survived.
**Cause:** CSS written against storefront markup is not a supported interface, and storefront updates can change it.
**What to do:** check whether a theme panel now does what your CSS was doing, and prefer the panel. Keep custom CSS minimal for exactly this reason.
**There is nothing stopping two people editing** — no drafts means no branching, and the last save wins.
**What to do:** agree who is working in the editor before a redesign. On a live storefront this matters more than it sounds, because both people are publishing as they go.
## Next Steps
The per-page work that follows the global design.
Every mode and panel in full.
The launch sequence this design work sits inside.
The escape hatch, and its costs.
online-store/themes
The theme editor has a lot of panels, and every one of them is already documented. What is not written down anywhere is the *order* to work in — and the order matters, because global settings overwrite the look of pages you have already tuned.
This guide is that sequence. It does not repeat the individual panels; each links to its own page.
## Prerequisites
**Required permissions:** `online_store:editor`, in view to open the editor and manage to change anything. **All four system roles hold every operation on it** — Owner, Admin, Manager and Member can all edit the storefront's design. See [Users & Roles](/docs/settings/users-roles).
**Before you start, understand one thing:**
**Saving publishes.** There is no draft, no publish step and no theme library — your account has exactly one storefront configuration and the editor edits it in place. Anything you save is live for customers immediately. Plan the work into sittings you can finish rather than leaving a half-changed design saved.
## The Walkthrough
From **Online Store → Themes**, the single card shows desktop and mobile previews and your storefront URL. **Edit** opens the editor.
There is no theme to pick and nothing to duplicate — one configuration, edited directly. The consequence is the whole shape of this guide: you cannot stage a redesign and release it in one go, so work top-down and save at points where the storefront is coherent.
If you close the editor with unsaved changes, a dialog offers **Save changes** or **Discard**. Discard is the only undo — there is no version history to roll back to.
**Theme** mode holds the settings that apply storewide. Do these before touching any page, because they change how every page already looks:
| Do this first | Panel |
| ------------------------- | ------------------------------------------------------------------------------------------------------------------------------------------ |
| Overall style and density | [Theme style](/docs/sales-channels/online-store/theme-editor/settings/theme-style) |
| Palette | [Colors](/docs/sales-channels/online-store/theme-editor/settings/colors) |
| Fonts and scale | [Typography](/docs/sales-channels/online-store/theme-editor/settings/typography) |
| Page width, spacing | [Layout](/docs/sales-channels/online-store/theme-editor/settings/layout) |
| Shape and emphasis | [Buttons](/docs/sales-channels/online-store/theme-editor/settings/buttons), [Inputs](/docs/sales-channels/online-store/theme-editor/settings/inputs) |
Getting these right first is what stops you re-tuning a home page twice. A colour change late in the process silently re-renders every page and every card on it.
With the tokens set, move to the component panels. In rough order of how much a customer sees them:
* [Listings card](/docs/sales-channels/online-store/theme-editor/settings/listings-card) and [Collection card](/docs/sales-channels/online-store/theme-editor/settings/collection-card) — the repeated units that make up most of a storefront.
* [Header bar](/docs/sales-channels/online-store/theme-editor/settings/header-bar) and [Search bar](/docs/sales-channels/online-store/theme-editor/settings/search-bar) — on every page.
* [Calendar](/docs/sales-channels/online-store/theme-editor/settings/calendar) and [Availability indicator](/docs/sales-channels/online-store/theme-editor/settings/availability-indicator) — where a booking is actually made, so worth more attention than their size suggests.
* [Announcement bar](/docs/sales-channels/online-store/theme-editor/settings/announcement-bar), [Breadcrumbs](/docs/sales-channels/online-store/theme-editor/settings/breadcrumbs), [Variant pills](/docs/sales-channels/online-store/theme-editor/settings/variant-pills), [Filter section](/docs/sales-channels/online-store/theme-editor/settings/filter-section) — the finishing pass.
The full panel list is on the [Theme Editor](/docs/sales-channels/online-store/theme-editor/overview) page.
Two things people hunt for in the editor and do not find:
* **The logo image is set in Settings → General, not in the theme editor.** The editor's [Logo](/docs/sales-channels/online-store/theme-editor/settings/logo) panel controls how the logo is *displayed* — width and placement — and says so, pointing you to **Settings > General** to change the file itself.
* **The favicon *is* in the editor**, on the same Logo panel, displayed at 32 × 32 px.
Account-level branding settings exist separately from the storefront theme. The storefront's appearance is resolved from the theme settings you edit here, so if a colour is not what you expected, it came from this editor or from the theme's own default — not from an account branding field.
The editor previews desktop, tablet and mobile. Because saving is publishing, the preview is your only pre-flight — use all three.
Mobile is where storefront designs break, and it is where most customers are. Check the header, the listing card grid, and the calendar at mobile width specifically; those three carry the most layout risk.
[Custom CSS](/docs/sales-channels/online-store/theme-editor/settings/custom-css) is the escape hatch for what the visual editor does not expose.
Treat it as a last resort rather than a shortcut. CSS written against the current markup is the part of your storefront most likely to break silently when the storefront updates, and nothing will warn you — a panel setting will not.
**Reset entire theme** does what it says, and with no draft and no version history there is nothing to restore from. Only use it when you genuinely intend to start the design again.
## How do I know it worked?
* **The storefront matches the editor's preview**, at desktop and at mobile width.
* **Nothing looks half-finished to a customer**, because you saved at coherent points rather than mid-change.
* **A colour or font change shows up everywhere it should** — cards, header, calendar — rather than only on the page you were looking at.
* **Your logo is right**, which means you set it in Settings → General.
## Troubleshooting / Common Pitfalls
**There is no version history and no draft to fall back to.** Discard only works before saving.
**What to do:** change the settings back by hand. This is the reason to work top-down and save at coherent points — and the reason to note what a value was before you change it, on anything you are unsure about.
**It is not in the theme editor.** The Logo panel controls display width and placement, and points you at **Settings > General** for the image itself.
**What to do:** set the file in Settings → General, then come back to the editor to size and place it.
**Expected — that is the order problem this guide exists to prevent.** Theme tokens apply storewide and re-render every page.
**What to do:** finish the global tokens before per-page work. If you are already past that, re-check the pages you tuned early rather than assuming they survived.
**Cause:** CSS written against storefront markup is not a supported interface, and storefront updates can change it.
**What to do:** check whether a theme panel now does what your CSS was doing, and prefer the panel. Keep custom CSS minimal for exactly this reason.
**There is nothing stopping two people editing** — no drafts means no branching, and the last save wins.
**What to do:** agree who is working in the editor before a redesign. On a live storefront this matters more than it sounds, because both people are publishing as they go.
## Next Steps
The per-page work that follows the global design.
Every mode and panel in full.
The launch sequence this design work sits inside.
The escape hatch, and its costs.